Lightroom Presets
Bundle of 17 Presets in One

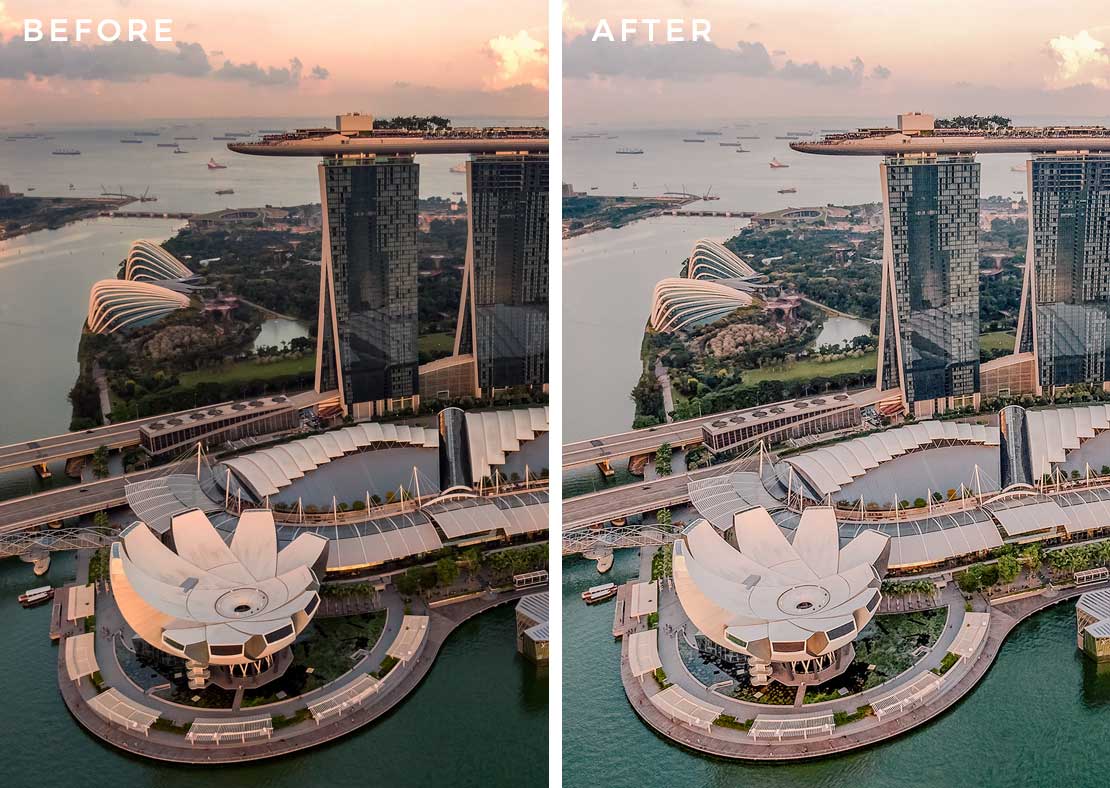
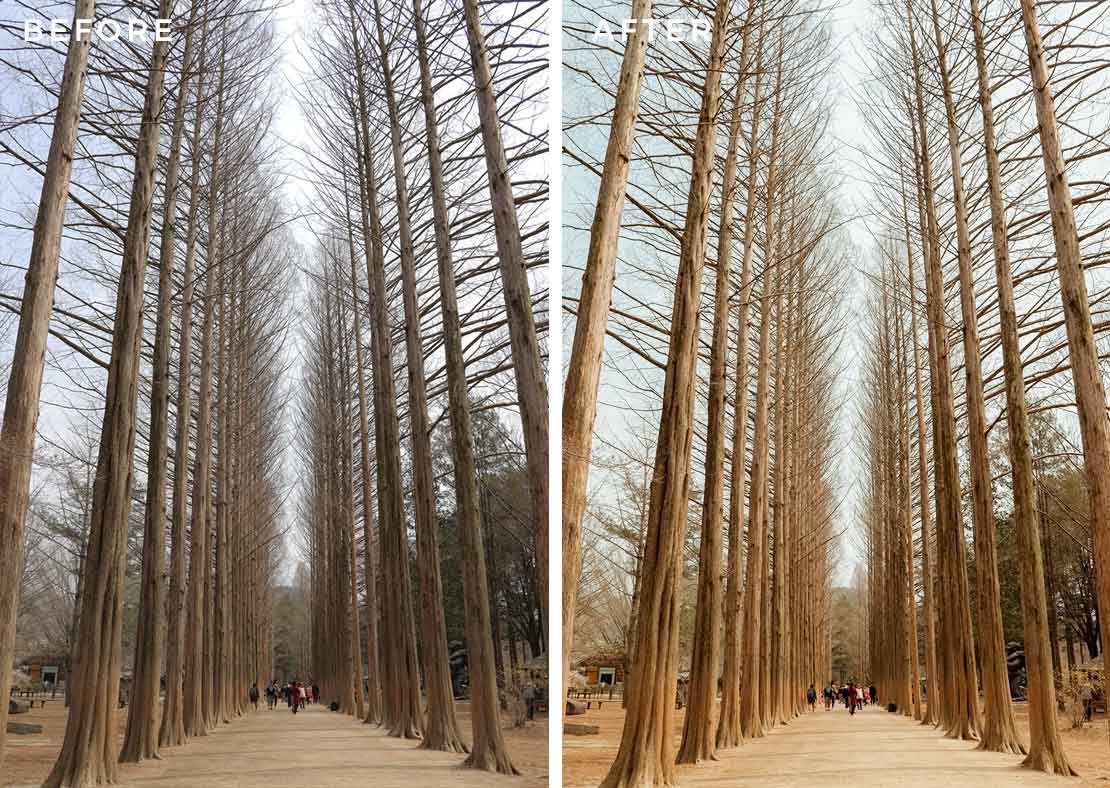
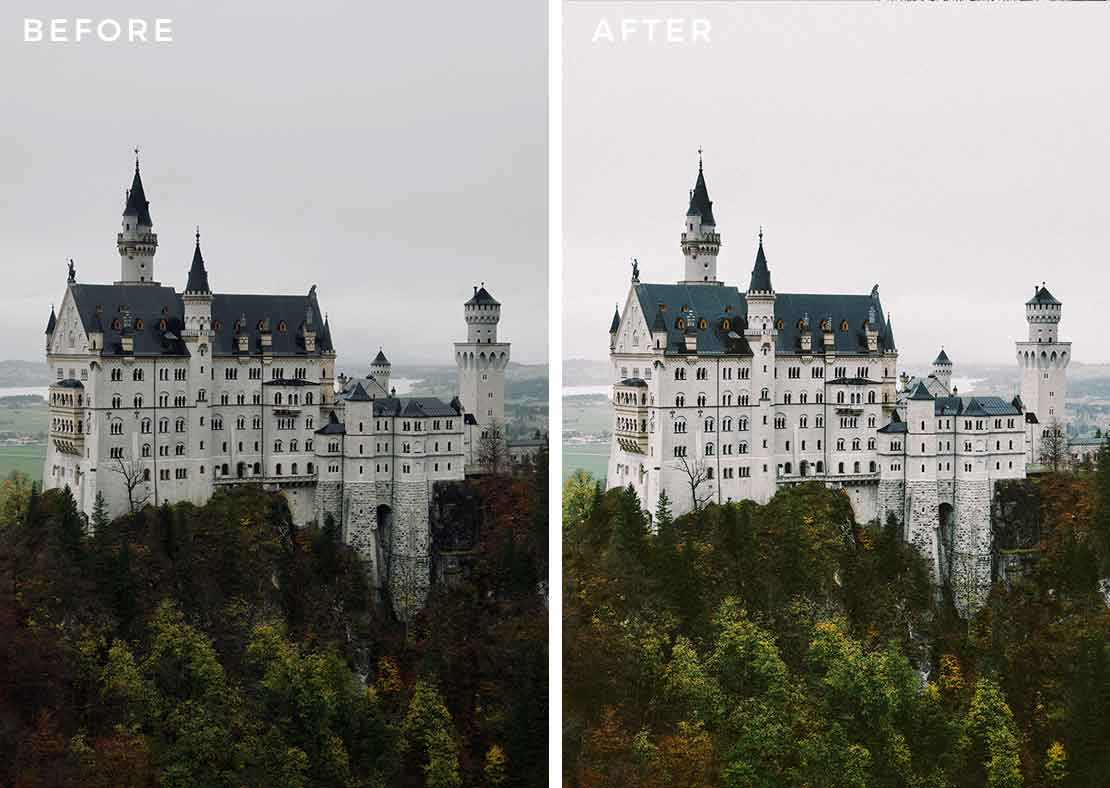
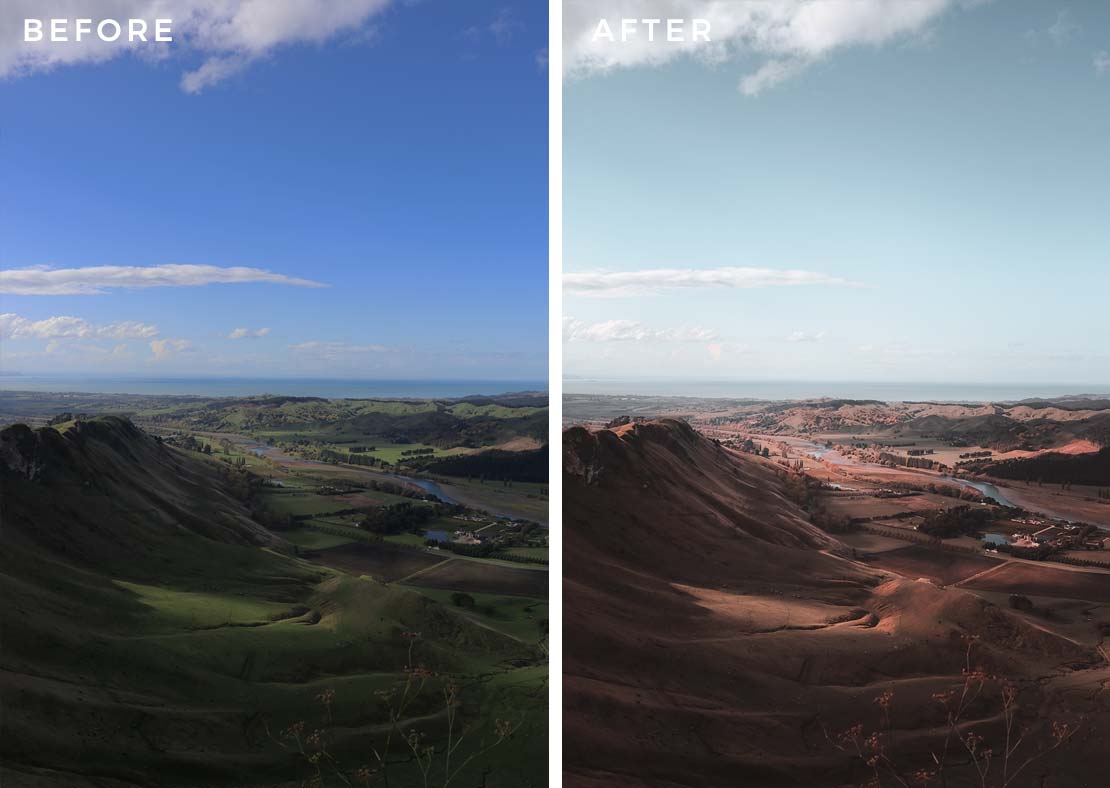
I know how daunting it can be to edit and improve photos, but I want you to know that it can be a lot less intimidating especially when you use my Adobe Lightroom presets!
To celebrate this launch, I’m offering this at a discounted price of only $35.00 for a value bundle consisting of 17 different presets. I hope you guys will love it and find it useful.
Desktop Version
Mobile Version
Or buy the Desktop + Mobile bundle for only $59.00!
installation guide
After payment is made, you will be directed to the checkout page where you can download my 17 ‘Lifestyle’ presets files, namely: Autumn, Bright, Cool, Film, Natural, Pale, Red Flush, Retro, Sandy, Shade, Subdued, Sunkissed, Urban Hue, Warm, Washed, and Winter.
These bundled presets are available in 3 versions: desktop, mobile, or both.
Desktop: Designed for use on the paid desktop software of Adobe Lightroom. As the name suggests, this will only work on your desktop/computer/laptop that has the Lightroom software installed.
Mobile: Designed for use on the FREE mobile app called Lightroom CC (iOS / Android). Likewise, this will only work on your smartphone.
Desktop + Mobile: Self-explanatory.
Which is better for you? It depends on your needs and usage. For me, I mainly use my presets on my desktop/laptop’s Lightroom software because I find that I have more editing control compared to when I’m using the mobile app — but of course, if you don’t have the budget to pay for the paid Lightroom software on desktop, using the mobile version will work best for you since the app is FREE. To better understand which of my preset versions will work best for you, check by my FAQ and Tips section below.
Desktop Installation Guide (For Windows)
- After you have downloaded my Lightroom Presets, unzip the file.
- Open the Lightroom software on your desktop.
- At the top bar, click: Edit > Preferences > Presets
- Under the heading ‘Location‘ click on the box that says: ‘Show Lightroom Presets Folder’
- Double click on the folder titled ‘Lightroom’
- Double click on the folder titled ‘Develop Presets’
- Copy the [A] Lifestyle Presets folder that you have downloaded from me and then paste in this Develop Presets folder
- Restart your Lightroom software so that the Lifestyle presets will load
- To start editing, import the photo you wish to edit by clicking: File > Import Photos and Video
- Once your photo is loaded, select it, and then click on the tab ‘Develop’ on the Lightroom Window
- On the left side of the Lightroom window, look for the Lifestyle presets on the ‘Presets’ section, and then select the preset/filter that you want. Feel free to adjust the settings as found on the right side of the Lightroom window.
- Once you’re done, save your photo by clicking: File > Export
Desktop Installation Guide (For Mac)
- After you have downloaded my Lightroom Presets, unzip the file.
- Open the Lightroom software on your desktop.
- At the top bar, click: Lightroom > Preferences > Presets
- Under the heading ‘Location‘ click on the box that says: ‘Show Lightroom Presets Folder’
- Double click on the folder titled ‘Lightroom’
- Double click on the folder titled ‘Develop Presets’
- Copy the [A] Lifestyle Presets folder that you have downloaded from me and then paste in this Develop Presets folder
FASTER ALTERNATIVE: Drag and drop the Lifestyle Presets folder onto your Lightroom application to install.
- Restart your Lightroom software so that the Lifestyle presets will load
- To start editing, import the photo you wish to edit by clicking: File > Import Photos and Video
- Once your photo is loaded, select it, and then click on the tab ‘Develop’ on the Lightroom Window
- On the left side of the Lightroom window, look for the Lifestyle presets on the ‘Presets’ section, and then select the preset/filter that you want. Feel free to adjust the settings as found on the right side of the Lightroom window.
- Once you’re done, save your photo by clicking: File > Export
Mobile Installation Guide
- After you have downloaded my [A] Lifestyle Presets (Mobile), unzip the file.
- Send the images found in the folder Lifestyle Presets (Mobile) to your smartphone. (Don’t worry if the images appear blank).
- Open the Lightroom Mobile CC app on your phone
- On the heading Albums, click the symbol ‘+’ and select ‘Create Album’. Name it ‘Lifestyle Presets’ (or feel free to use another name to label it)
- Open this album and click the symbol ••• found in the top-right corner.
- Select Add Photos > Camera Roll and select all the Lifestyle Presets photos (they’re the ones marked with ‘DNG’). Click Add.
- Now select a preset photo, click the top-right corner symbol ••• and select ‘Create Preset’. Enter your desired name under ‘Preset Name’, or you can also use the same title I named it as. Repeat this process for the rest of the preset photos.
— Under ‘Prest Group’, you can create a new one or label it under the default ‘User Presets’. - To use any of the presets you just saved, open a new photo. Select ‘Presets’ from the lower tab’s set of icons. Make sure you are in the correct ‘Preset Group’ name and then select the preset you want to use and that’s it! Feel free to adjust any of the settings and then click the checkmark.
- To save this edited photo, click the send icon (3rd one on the top) on the top right corner and select Export to Camera Roll.
NOTE: If you loved my ‘Lifestyle Presets’, feel free to send your before-and-after photos to my Instagram account so that I can share it on my Instagram Stories! (It will be added exposure for you too *wink*).
frequently asked Questions
What are Lightroom Presets?
Lightroom is basically the professional editing and coloring program that a lot of Instagrammers and photographers use worldwide to enhance their photos, and its presets are edit settings that have been saved beforehand (in fact, you can think of presets as filters!). So this ‘Lifestyle Presets’ bundle for instance are settings that I have created myself.
Lightroom’s desktop software is what I recommend the most if you want to make the most when editing your photos. Since it’s a paid software, it can be quite costly — but think of it as an investment! (If you’re a student or teacher, you can even get a 60% discount from Adobe!).
Are these the presets you usually use?
Yes and I typically use the presets called Subdued and Golden. However, it helps to note that even after applying these presets, I still often do some minor tweaks because naturally, not all photos have uniform brightness, exposure, etc.
Meanwhile, some of the other presets in this bundle are settings that I don’t really use for my feed but I have created them still because they have been in demand by you guys (for instance, some of you wanted to know how to make a photo look like a shot taken with film, etc.).
Are these the only presets I'll ever need?
This will already be a good start for you to make the most out of your shots. It’s also a good chance for you to eventually create presets of your own.
How do I make the most of these presets?
Firstly, make sure you take photos in RAW — but it’s also fine if you can only take photos in JPEG or from your mobile phone.
Second, test as many of the Lifestyle Presets I’ve made to see which would best suit your photo. Once you find the preset that’s right for you, it’s highly likely that…
- You ended up having a photo that’s too dark or too bright. This usually happens because your original photo might have been taken with too low or too high of an exposure setting — don’t worry, this happens! To fix this, play around with the exposure, highlights, shadows, whites, and blacks settings to correct it.
- Your skin ended up looking weird. Go and adjust the color of the red, orange, or yellow tones by changing their hue, saturation, and luminance.
- You don’t like the certain hue of a color on your photo. Similarly, just adjust the hue of that color. Most of the time people like to change the color of greens (or the leaves on the trees in their photo) and make it look a bit yellowish, so adjusting the hue will help you achieve that look.
Can I reshare the presets I bought to my friends?
I ask that you please refrain from doing that because it would be a copyright violation. If you want your friends to get these presets too, kindly ask them to purchase this bundle themselves. Thank you!
Can I use these presets on Photoshop?
What photos are best partnered for each of the presets?
All kinds of photos can be used for any of these presets, but indeed, it will depend on the kind of mood that you want to achieve.
Anyhow, when I labeled the presets, I have set a name that best describes the kind of “feel” that they emit.
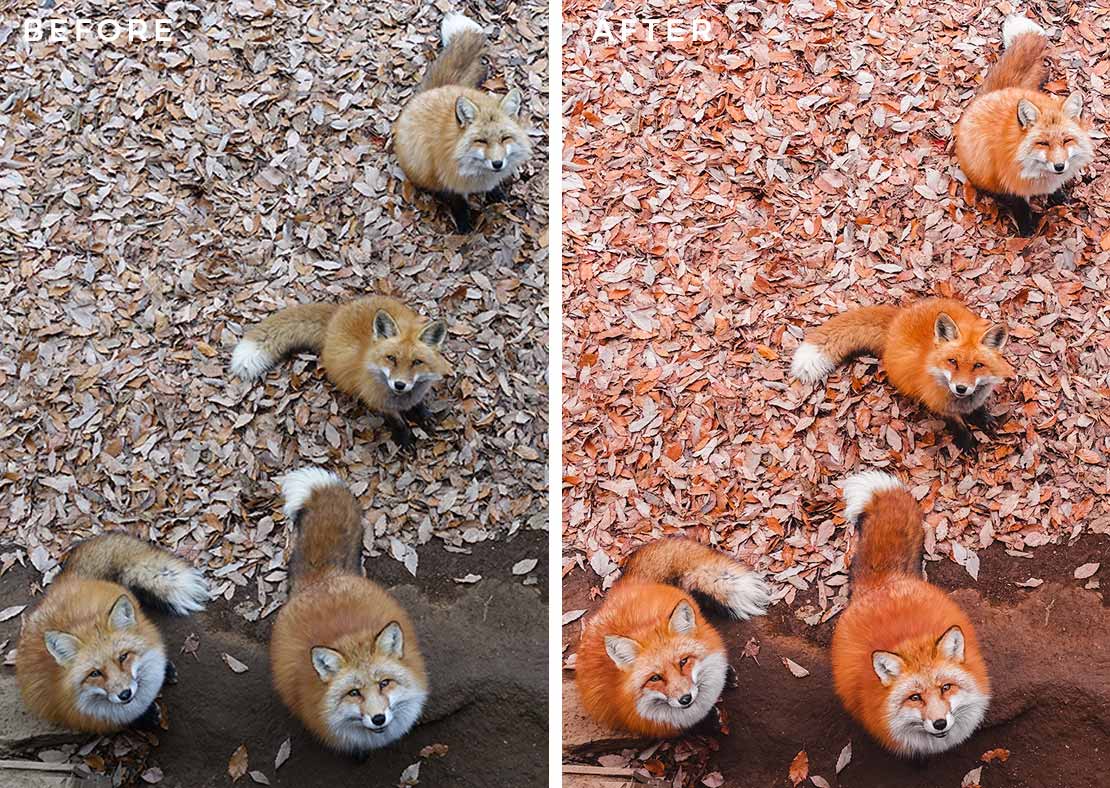
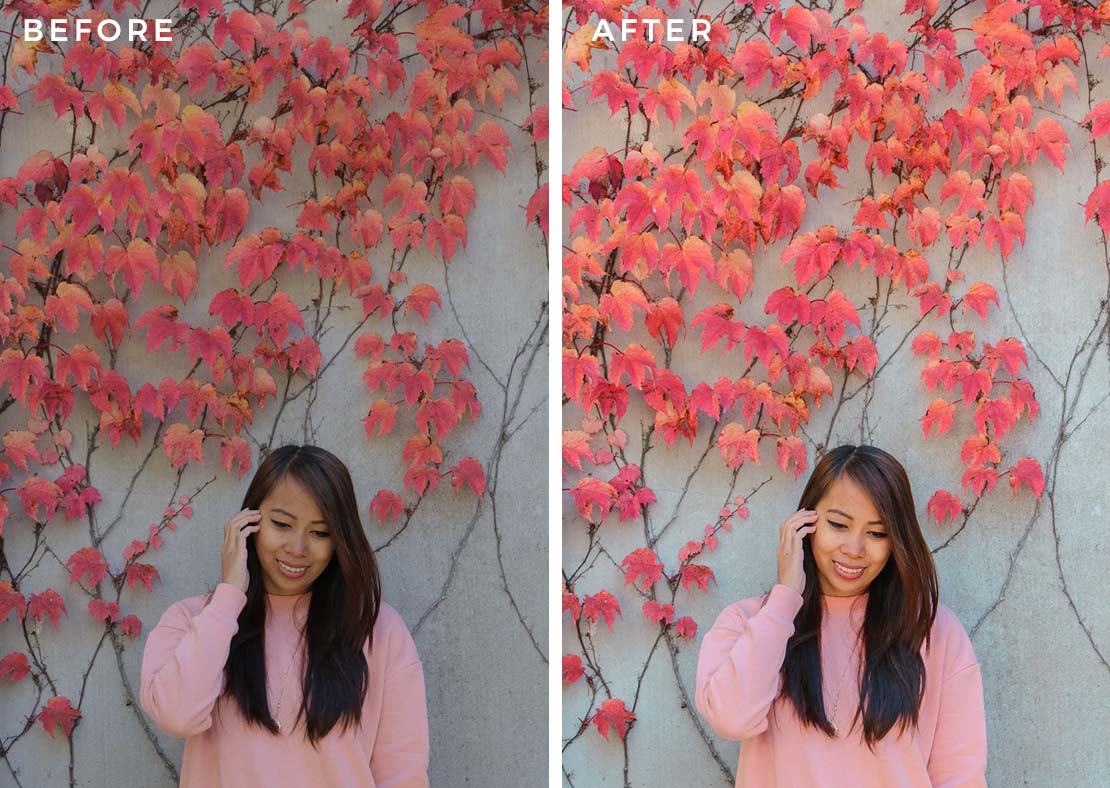
- Autumn: self-explanatory, great for photos taken in autumn
- Bright: self-explanatory
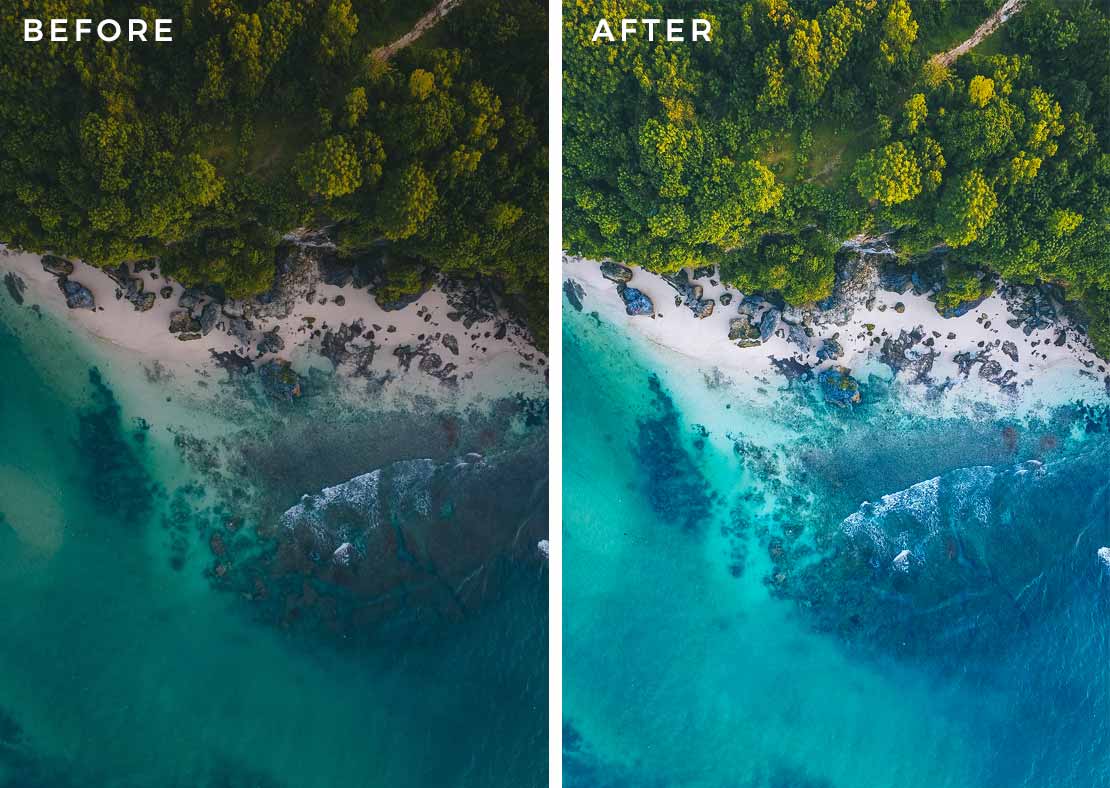
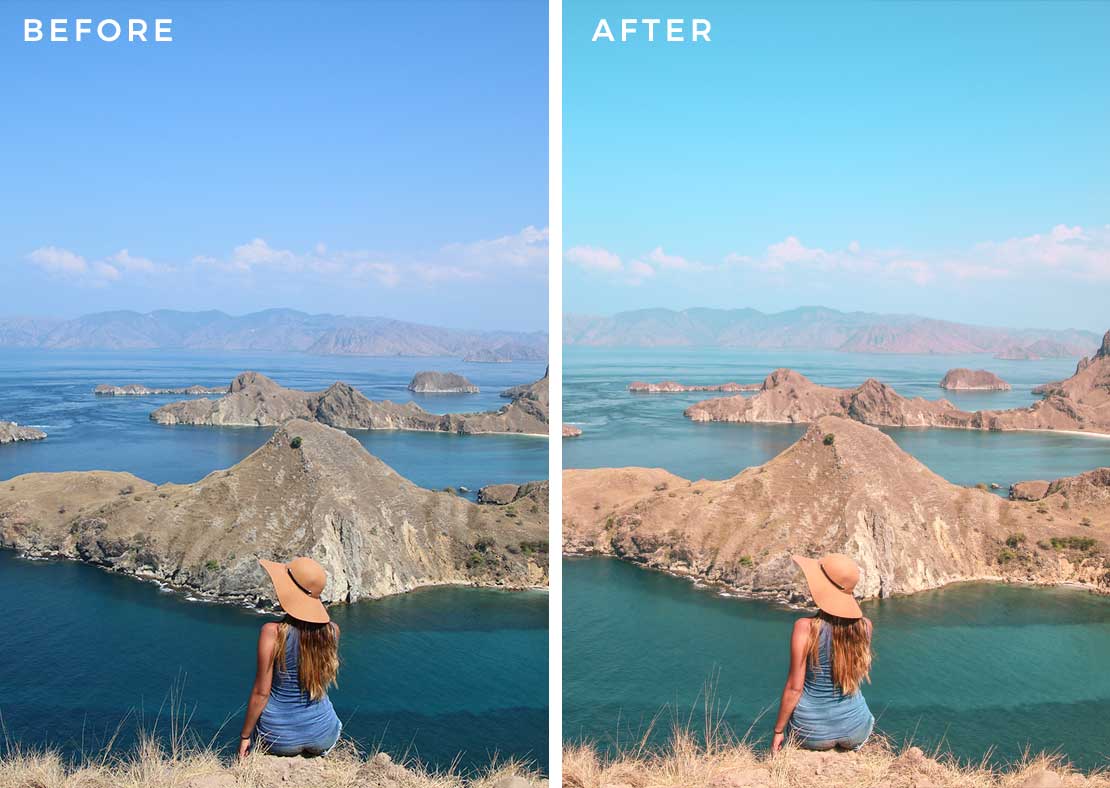
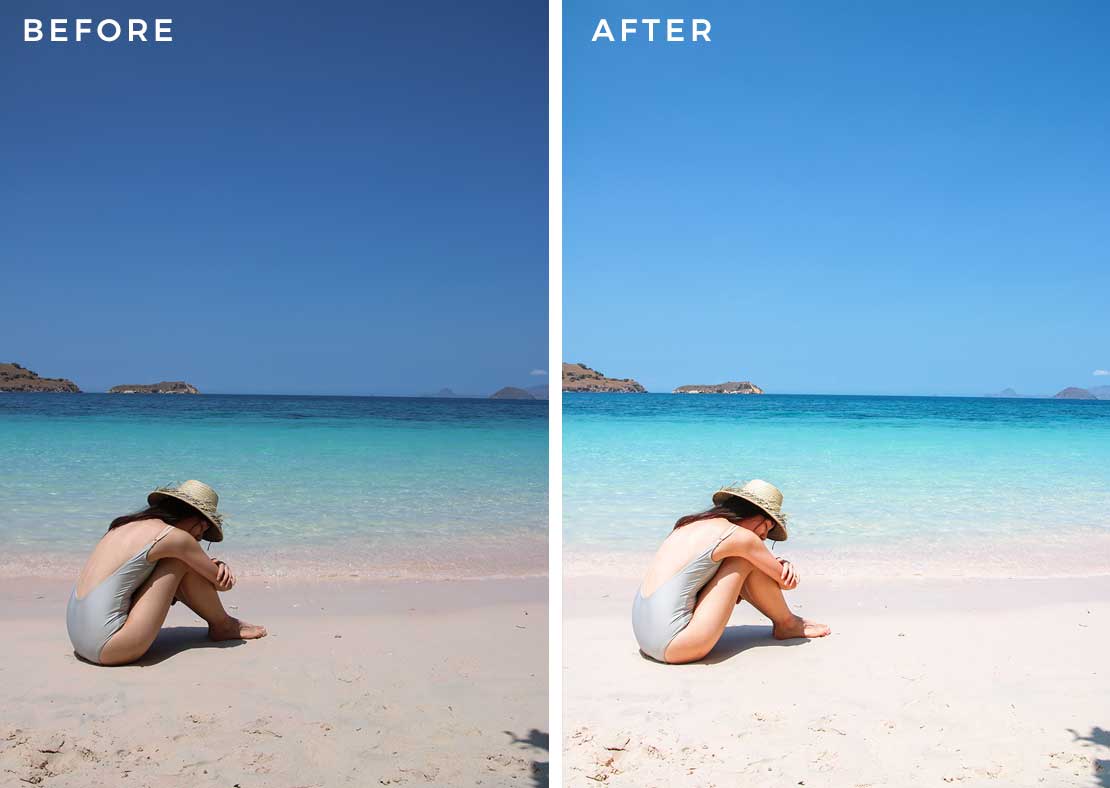
- Cool: great for photos that feature the sea or any body of water
- Film: gives off that film look, complete with added noise
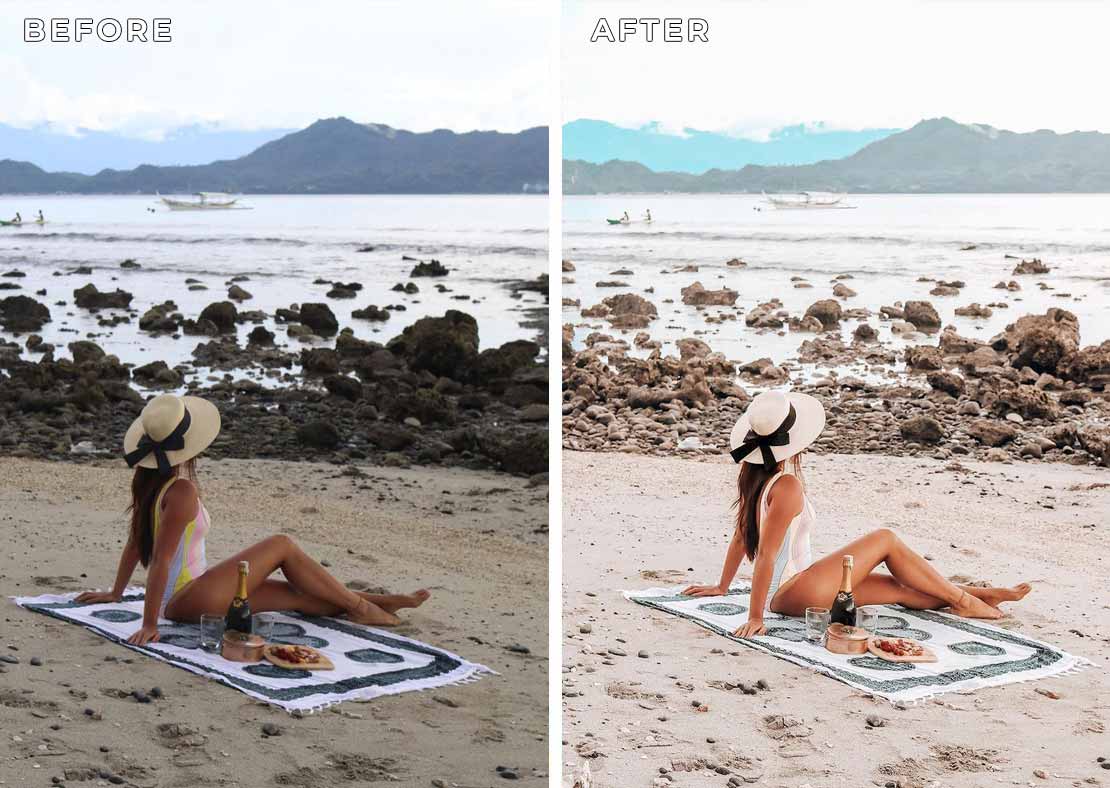
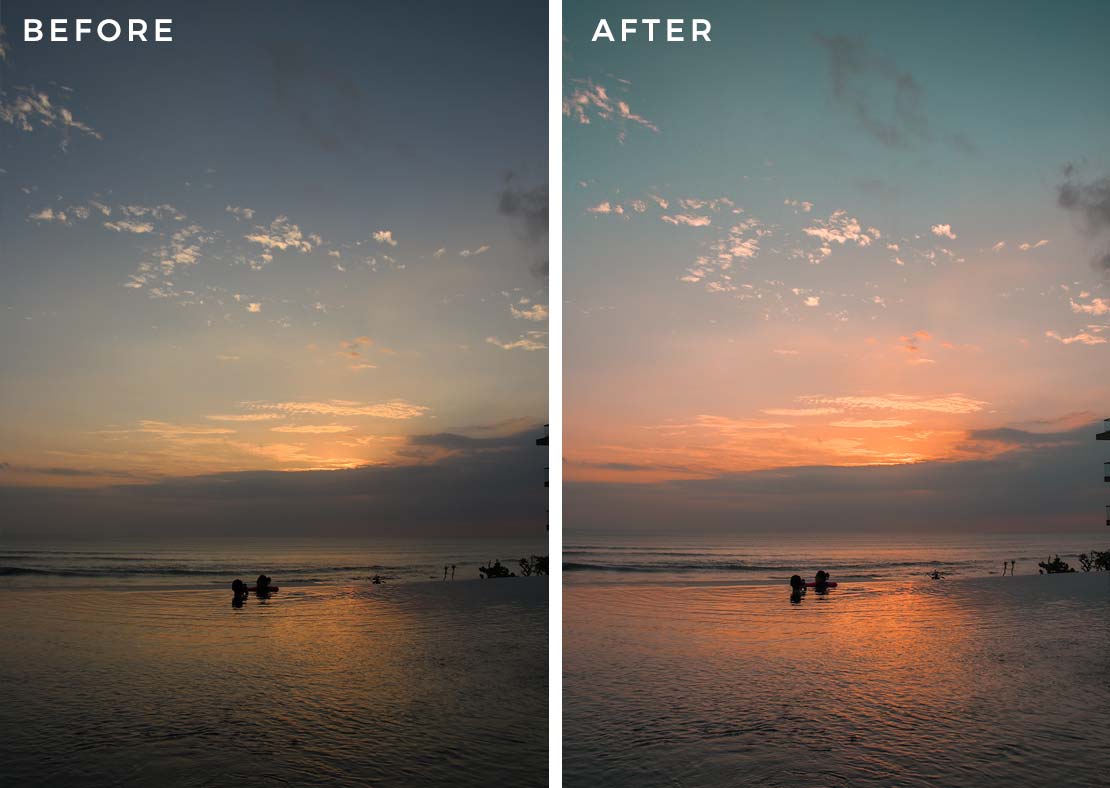
- Golden: perfect for that sun-tanned look!
- Natural: self-explanatory
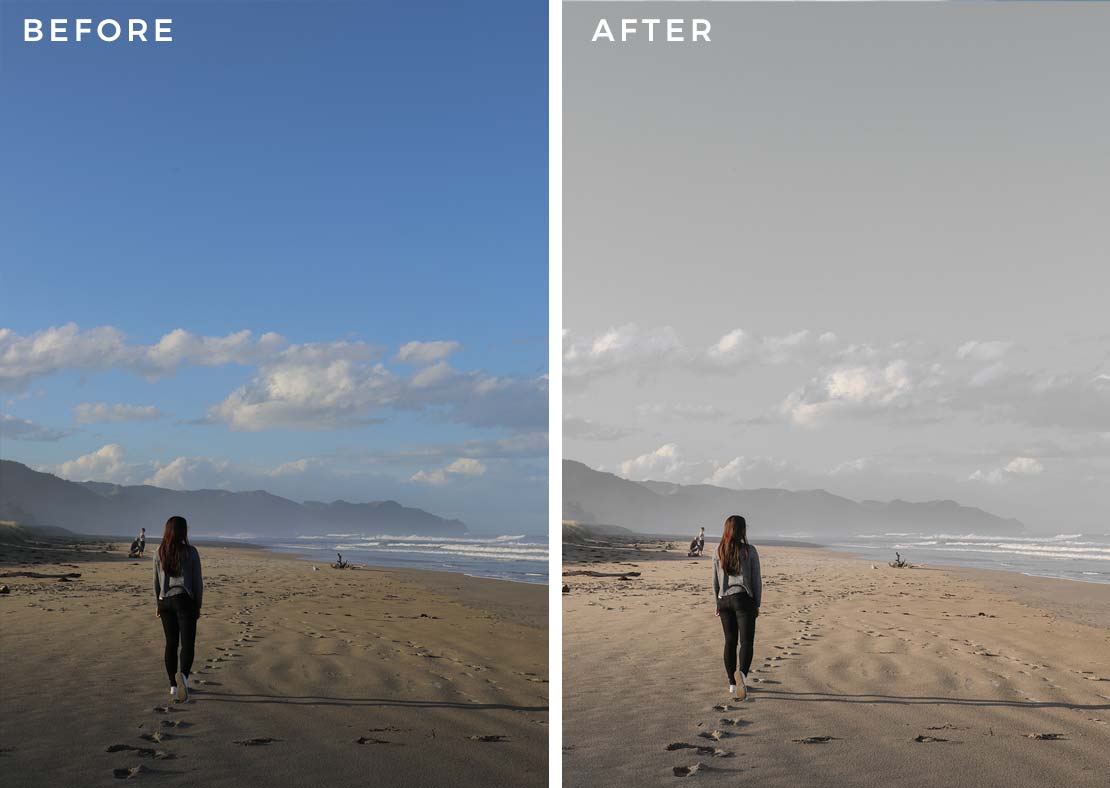
- Pale: self-explanatory, lessens saturation of most colors (almost in a grayscale)
- Red Flush: gives off a dominant brownish-red hue
- Retro: self-explanatory (or at least, the mood often makes me feel like it’s retro, lol, I’m probably wrong though)
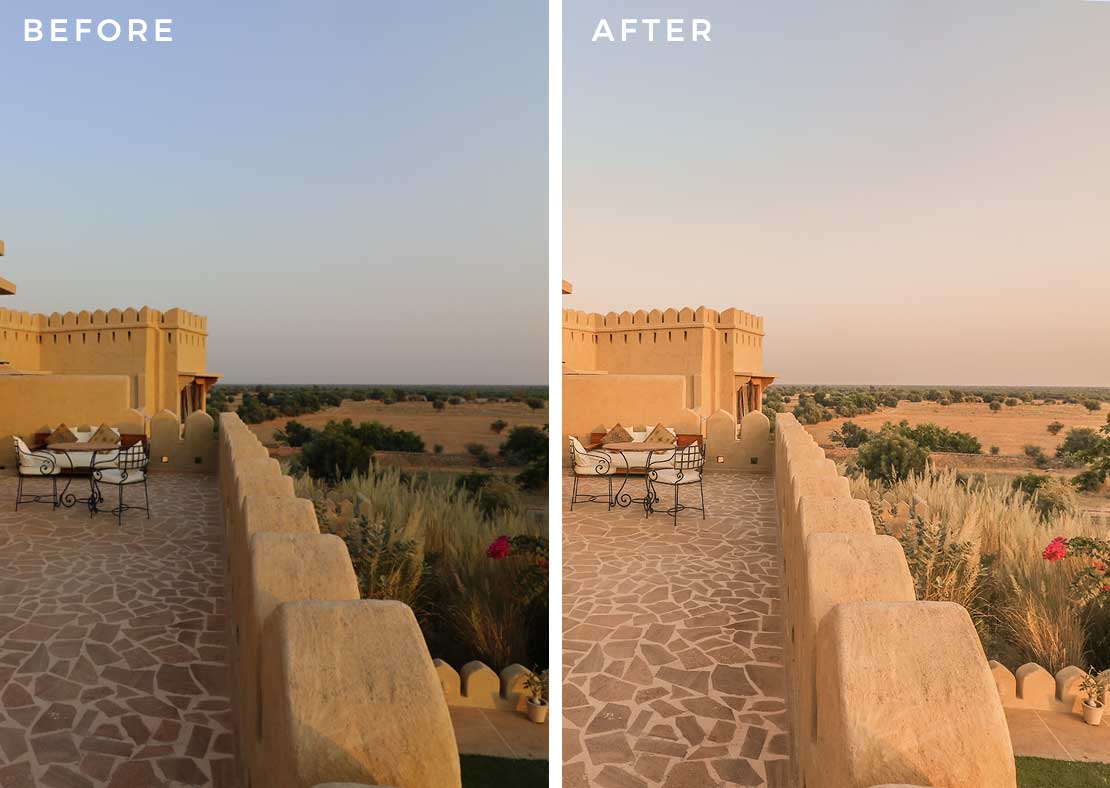
- Sandy: great for photos taken in places like deserts, dry terrain, etc.
- Shade: great for applying dark yellow undertones
- Subdued: this is the preset I mainly use for my photos, often good for portraits
- Sunkissed: variation of Golden preset above
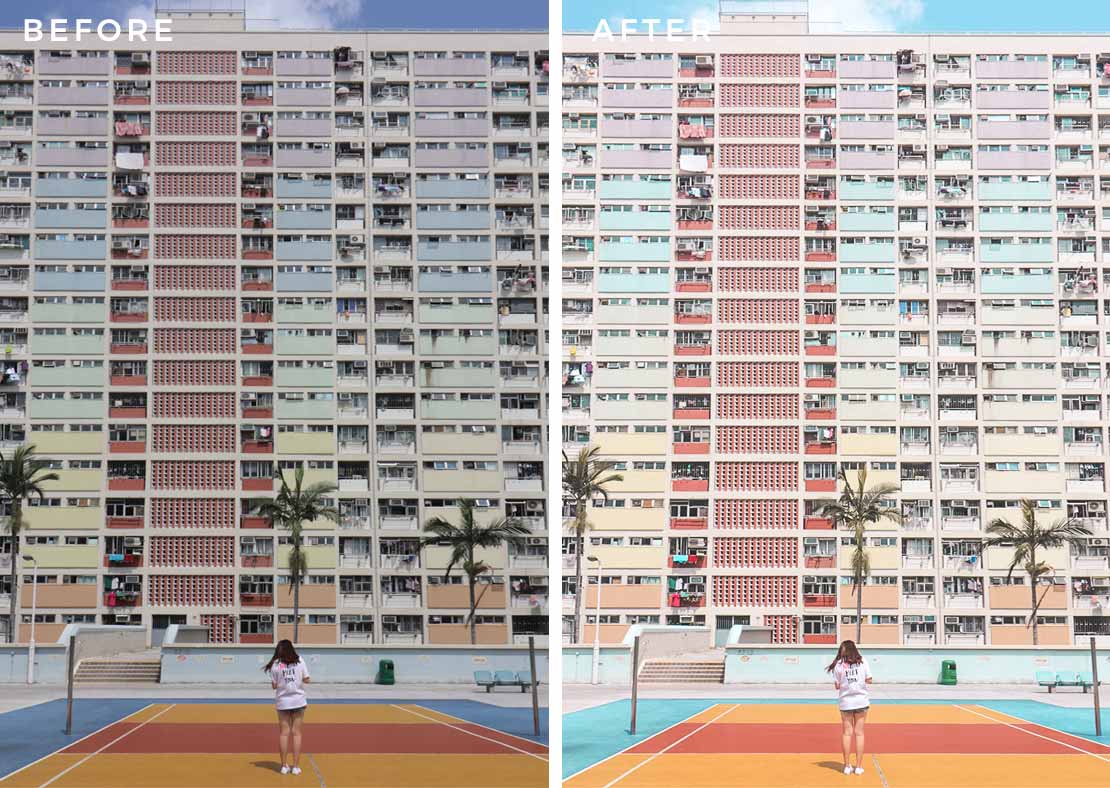
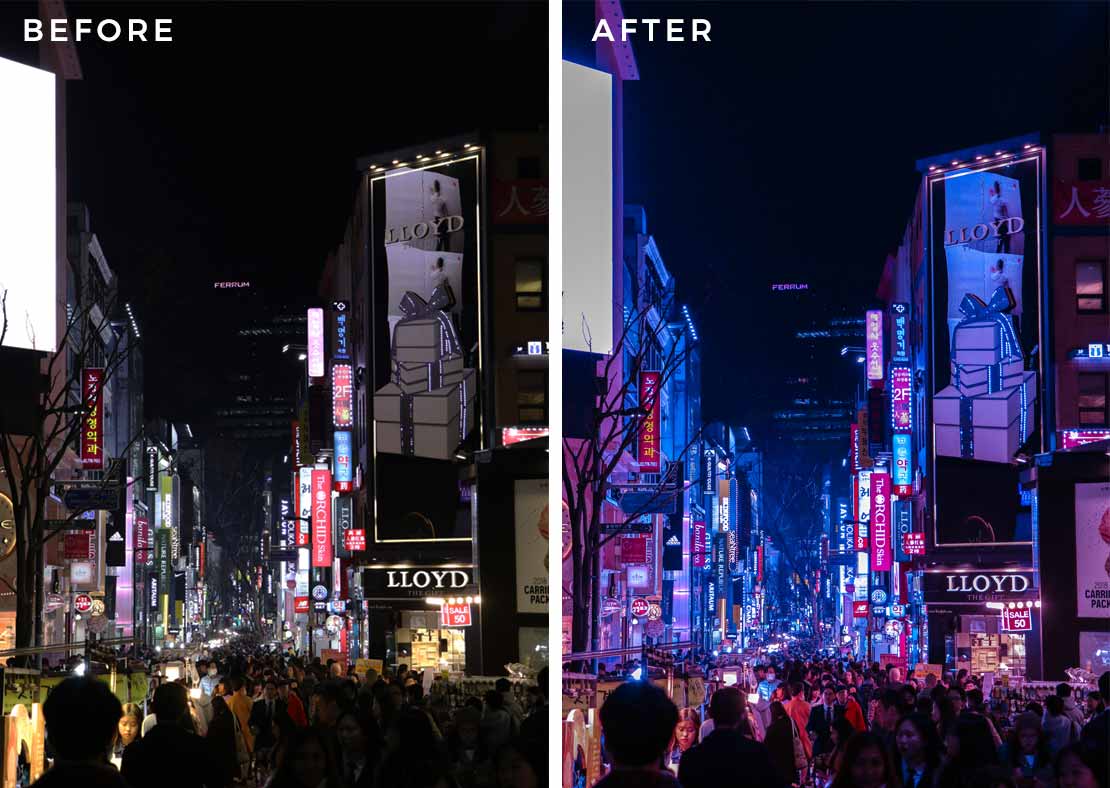
- Urban Hue: great for night photos of cities or urban spaces, gives dominant tints of blue and pink
- Warm: best to use if you want to make the photo appear like it’s under the sun (or yellowish)
- Washed: brightens and softens colors
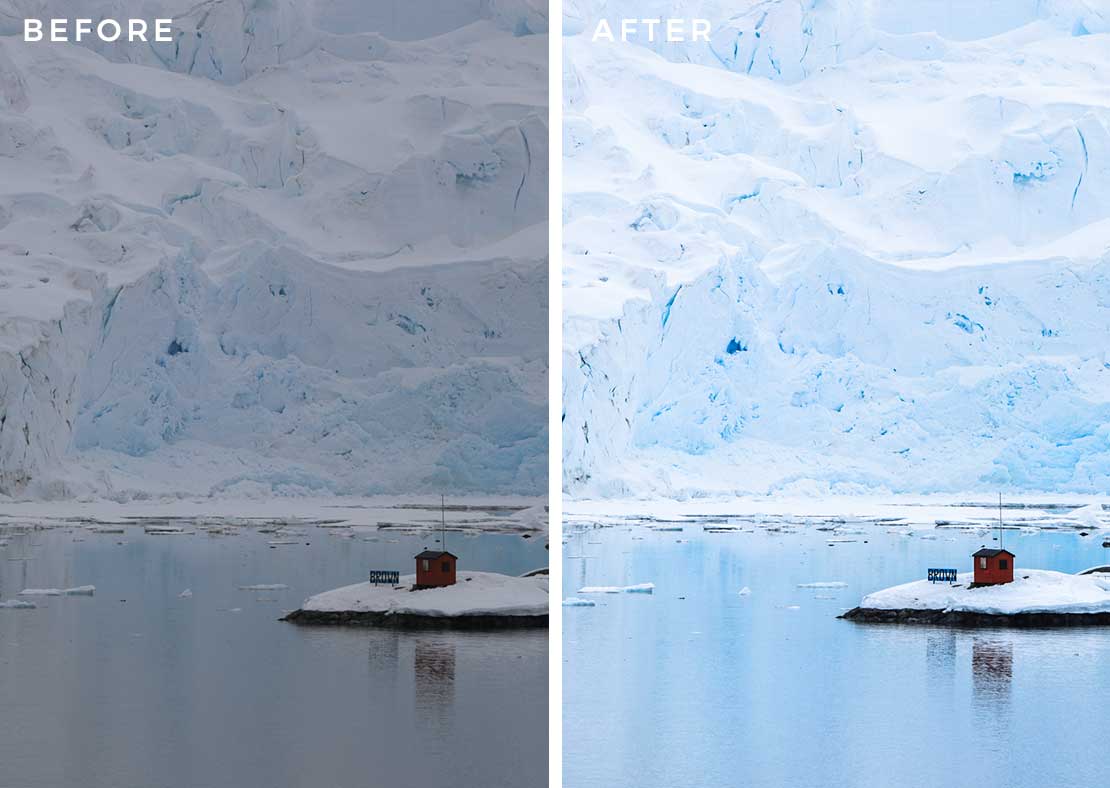
- Winter: self-explanatory, great for photos taken in winter or snowy places (ironically, this is sometimes great to use for photos taken on the beach).