If you were to ask me what would be the most grueling YET breathtaking hikes that I have done so far, there are two (2) things that I can quickly think of: my journey up to Villingardalsfjall in the Faroe Islands, and to Trolltunga in Norway.
Newsflash: I’m not really ‘built’ for long hikes nor am I an extremely fit person per se; but as a traveler, if I get wind of a spot that’s too breathtaking for words, you bet that I would I go there in a heartbeat — no matter if I have to push my limits. That’s why when I visited Norway for the first time, I made it a point to visit this iconic and picturesque rock formation (which name aptly translates to ‘Troll’s tongue’).
Best Tours in Norway?
Come and check out this list of the top things to do in Norway which features the best activities and tours to do in Oslo and more!
How was it, you might ask? Well… it was a challenge!
Spanning at about 22 to 23 kilometers long with an ascent of about 1,000 meters, it was a hard and long hike that took me a total of 11 hours! But despite that ordeal, it was an experience that was oh-so-worth-it on my books.
So as someone who has been through this arduous hike, I would love to impart some helpful tips and guides so that YOU can make the most of your experience in conquering Norway’s famous Trolltunga — no matter if you’re an experienced hiker or not!
» READ: Norway Road Trip Itinerary
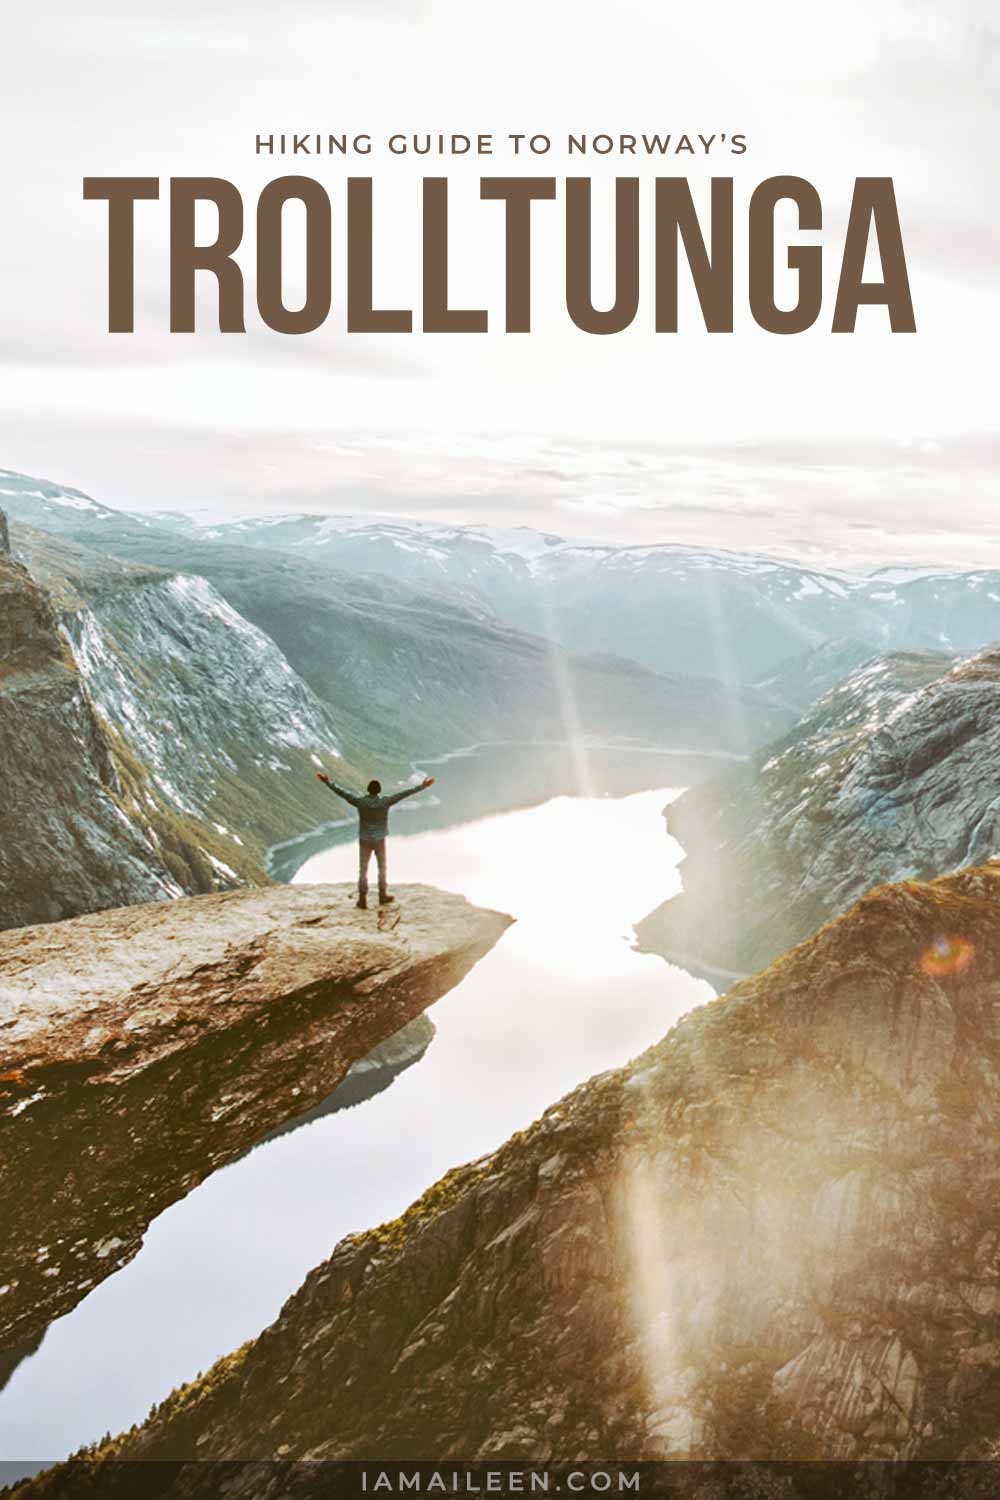
Trolltunga Hiking Guide
» What is Trolltunga (Troll’s Tongue)?
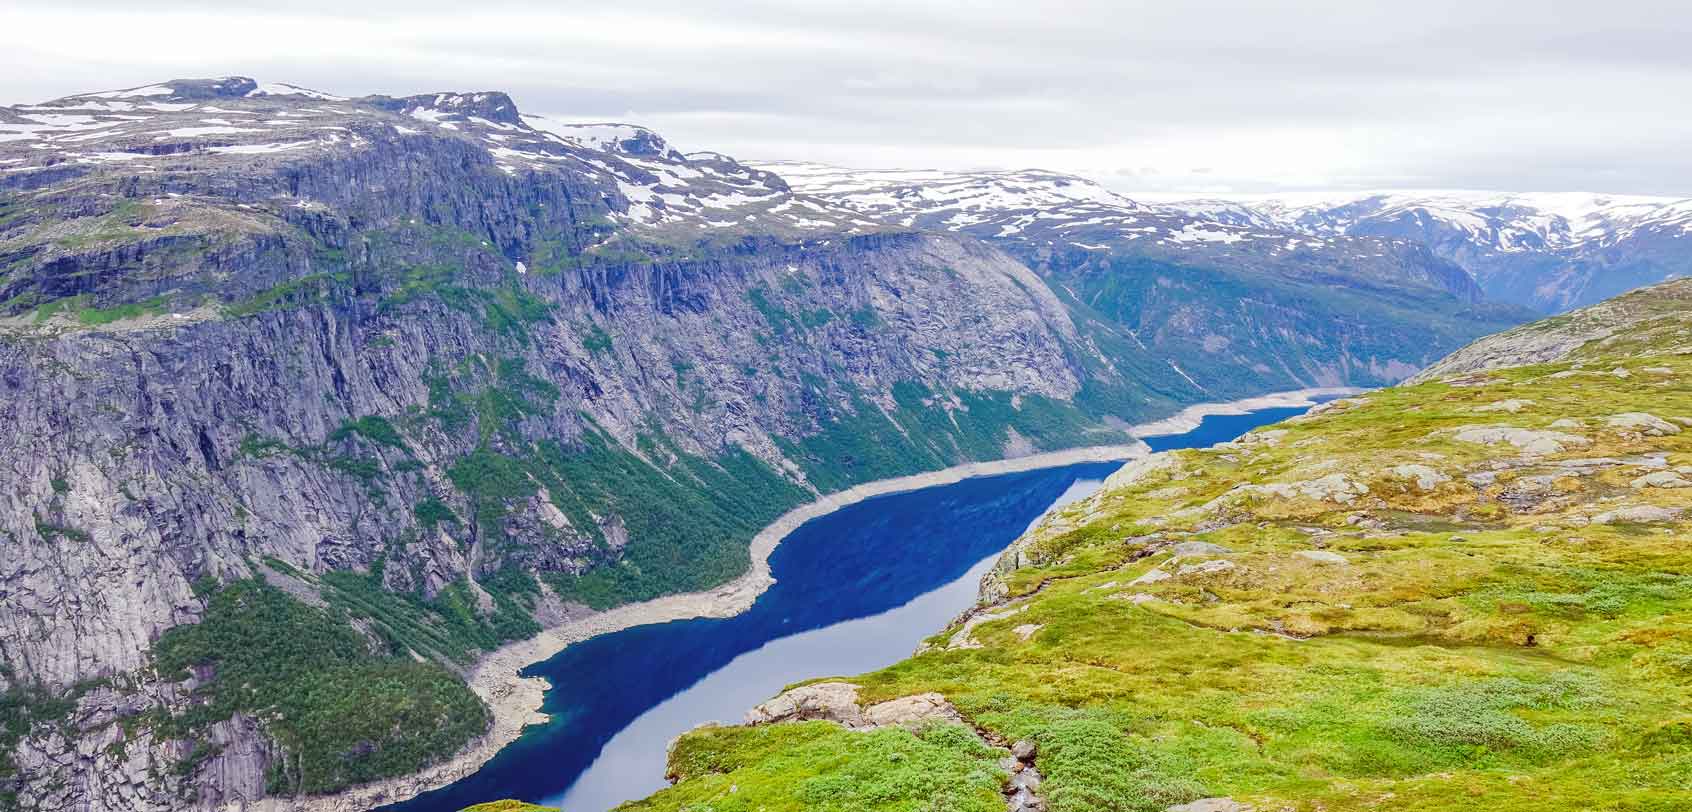
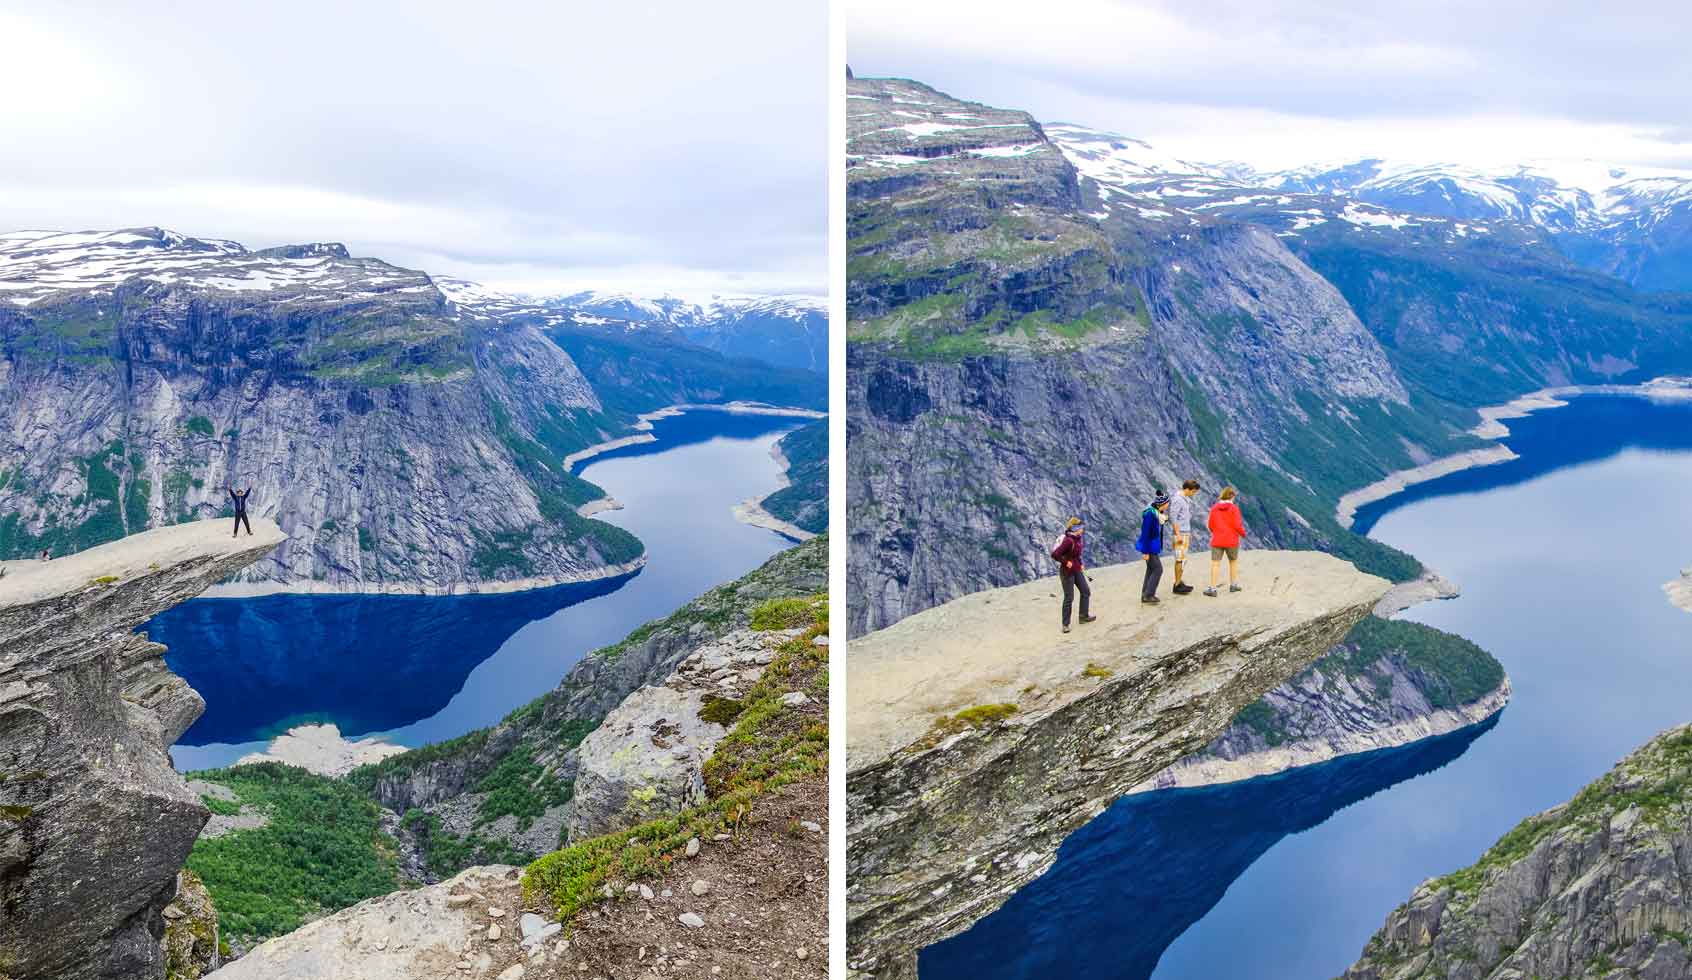
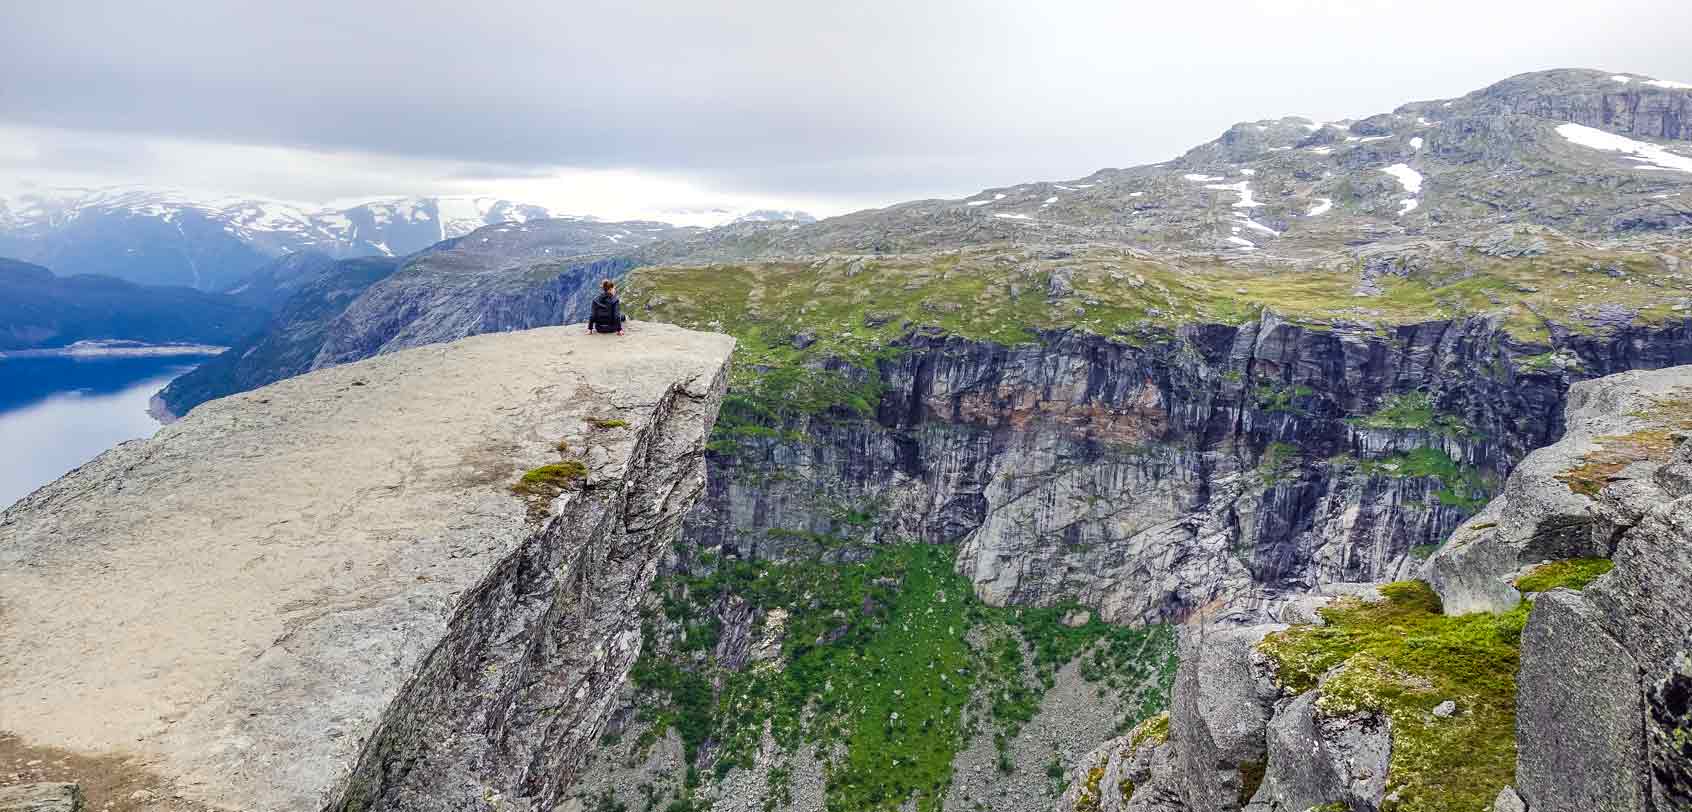
A cliff rock that juts out like a ‘tongue‘ for about 700 meters above the lake of Ringedalsvatnet, this popular attraction in Norway is part of a bedrock that was formed thousands of years ago during the ice age due to glacial erosion.
Trolltunga has since been regarded as one of the best hikes in the world upon its discovery and it can be reached via a trail that passes through the aforementioned bedrock — a formation that is amidst a range of impressive fjords, awe-inspiring glaciers, spectacular blue lakes, and scenic rocky landscapes with spots of green.
TRIVIA: This used to be a multi-day hike and with a funicular (cliff railway) that takes you to the top. When it stopped operations, people climbed up the steep steps of the funicular; however, ever since 2010, it was forbidden to use it for tourism because of safety issues. Today, there is a steep rocky path to the left of the funicular that serves as the starting point for the Trolltunga hike. Anyhow, if you wish to spend more time on the hike, camping is also allowed up on the mountains.
.
NOTE: Wanna quickly see some pre-travel tips such as where to stay (for accommodation), the best flight deals to find to Norway, and so much more? Feel free to skip the bottom section of this post.
Hike Details
- Duration: About 8 to 12 hours
- Distance: About 23 kilometers
- Difficulty: ‘Hard’ especially for non-seasoned hikers, and ‘moderate’ for seasoned hikers
- Ascent: About 1,000 meters
- Height above sea level: 1,100 meters
- Children: Officially, they don’t advise the hike for small children under 15 years old, but there have been kids as young as 8 who have gone through here
- Surface: Mostly rocky with patches of green and snow on the top
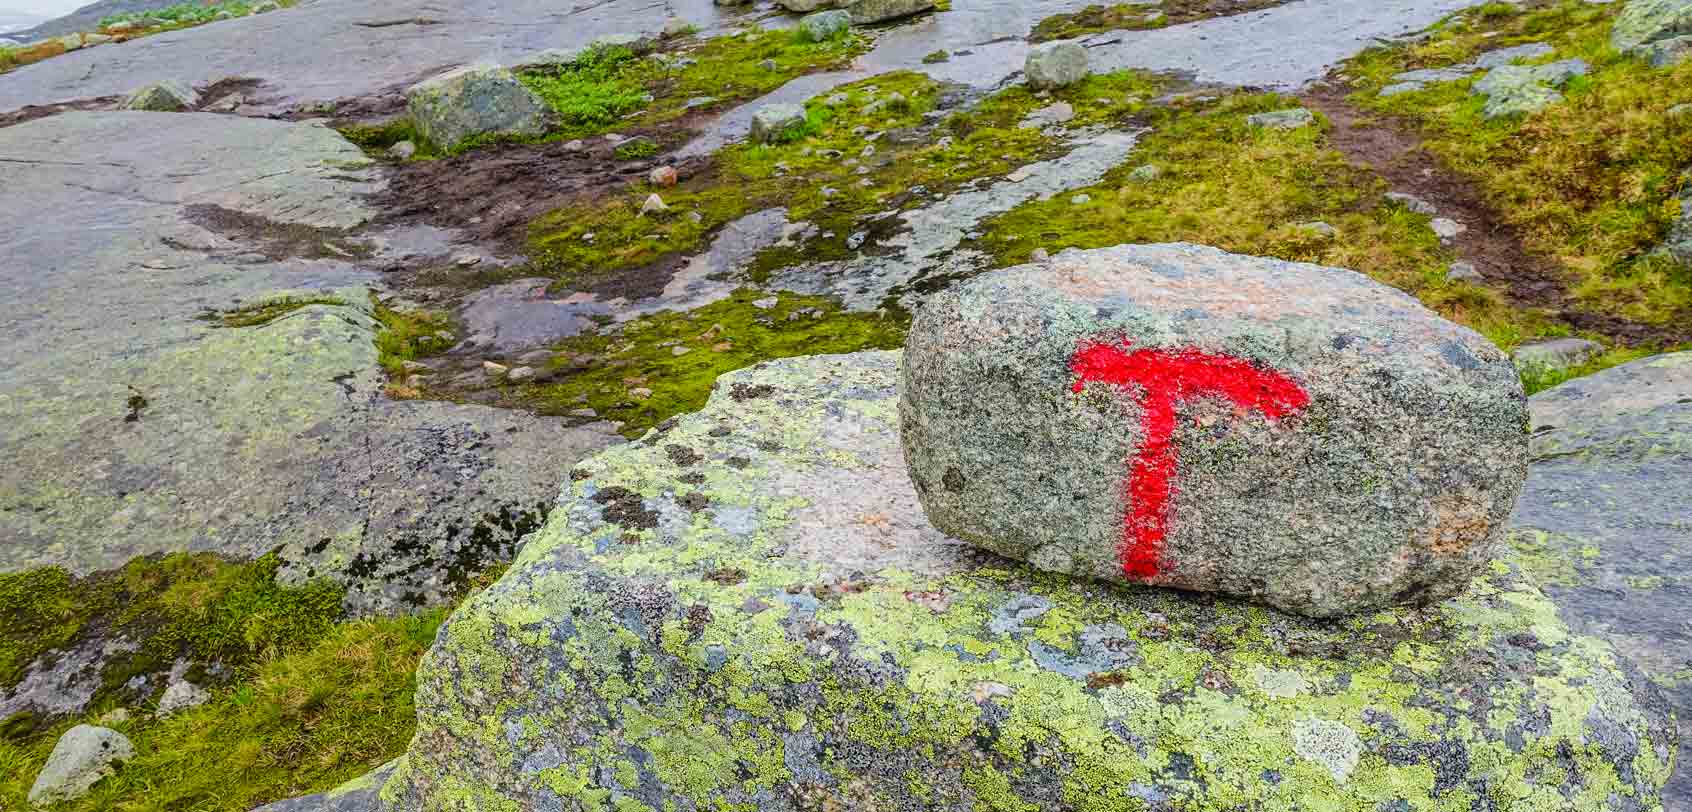
- Trail Mark/Guide: Simply follow the cairns or rocks with big red marks of the letter “T“; there are enough signs all over the trail as well as other hikers that you can use as a ‘guide’ to follow especially now that the hike is very popular for tourists
- Accompaniment: Can be done with or without local guides (if interested in a guide, you can book with Trolltunga Active [website])
- Phone/Mobile Coverage: None
» Where is Trolltunga located?
The town nearest to Trolltunga would be Odda which is located in southeastern Hordaland country that can be easily accessed from either Bergen (2-3 hours away) or Oslo (6 hours away) by bus, car, or train. My companion and I were doing a big road trip around Norway as we traversed through National Tourist Routes and towns along the way — so, we reached Odda by car.
Once you are in Odda, you need to get to Tyssedal (Route 13) and then up to the mountain settlement of Skjeggedal which is easily found on maps or on your car’s GPS. From there, you will be driving through a serpentine road until you reach the parking lot area which is the start of the hike. Rest assured, there are enough signs that will lead you to this place. (NOTE: There will be a parking fee of 300 NOK per day at Skjeggedal). You can also opt to park at Tyssohallen in Tyssedal (for 150 NOK per day). Helpful to note as well: the machines for parking also only take coins or bank cards.
UPDATE: There is a new alternative parking located up on the mountain that’s nearer to the trail (Topp) for only 30 cars. It’s located 4km from Skjeggedal with a road that’s steep and narrow — involving a 400-meter ascent and 17% maximum gradient. That being said, be careful when driving through here. This road opens up at 7AM and it is a ‘first come first serve’ availability for cars that are below 2m height (mobile homes and motorcycles are not allowed). Parking cost is at 500 NOK per day and it is to be paid at the start of the road). More details can be found here: www.trolltunga-road.com/en/
If you don’t have a car, there are other options for you:
- Public Transportation.
- From Odda to Skjeggedal, take the bus route 995 for about 80 NOK (but I’m not sure if it takes you up to the starting area of the hike or if it’s only at the foot of Skjeggedal; with that, please check or inquire via the website www.skyss.no to be sure).
- From Bergen to Odda, take the bus route 930.
- From Oslo to Odda, take the train from Oslo to Voss, and then the bus route 990 from Voss to Odda.
- Shuttle. Inquire with your accommodation in Odda if they have a pick-up service to Trolltunga (since most of them do).
- Hitchhiking. The cheapest option there is, but please do this with caution.
» When to do the hike?
Months: It is best to do the Trolltunga hike from mid-June to mid-September. It is NOT advisable to go from mid-October to mid-March because of the unpredictable weather as well as the high level of snow. It helps to note as well that during that winter season, there is typically only 4 to 5 hours of light. Nevertheless, you can start doing the hike from mid-March and join a guided snowshoe hike with Trolltunga Active [website]. Aside from extra activities like kayaking and waterfall safaris, they have the following hiking services and schedules:
- Mid-March to end of May: guided snowshoe hike
- End of May to mid-October: guided hike, bike, and ferrata climb
TO SUMMARIZE:
— Mid-October to Mid-March = Strictly NO hiking
— Mid-March to Mid-June + Mid-September to Mid-October = You can hike WITH a guide only
— Mid-June to Mid-September = You can hike WITH or WITHOUT a guide
With the help of the tourism board of Norway, they arranged a guided tour for my friend and I with Trolltunga Active via their ‘Classic Trolltunga‘ package at a cost of 900 NOK per person. It’s not really necessary to take a guided tour (except the periods I’ve indicated above) because you can absolutely do the hike by yourself! But for non-seasoned hikers like me, I would really recommend Trolltunga Active for a lot of reasons:
- The guide can help control your pace and assist you (I swear, if he wasn’t there, I would have burned all of my energy ASAP and I might not have been able to finish the hike — which would be a shame)
- They impart a lot of helpful infos and trivia not only about Trolltunga but Norway in general
- They provide free hiking sticks for you to use, plus they already carry all the necessary first aid essentials which helps lessen the things you have to pack
Time: It’s recommended to start the hike at 8:00AM latest. If you’re a seasoned hiker, you can start at 10:00AM. At the 4-kilometer mark of the hike, there is a distinct yellow sign there and if you reached it after 1:00PM during the period after mid-August and before mid-June, you are advised to turn around because the darkness sets in pretty early.
» What to bring for the hike?
Clothing & paraphernalia: Bring hiking clothes and shoes according to the forecasted weather. We did this hike in early July, and though it was sunny that day, it got really cold at the top with snow patches here and there. And when we went back, it even started to rain.
Unpredictable weather is a common trait for this hiking trail, so it’s best that you wear clothing and shoes that will prepare you for the heat, the cold, and the rain. To list it all out, I had the following essentials:
- Layered breathable shirt and sweater
- Extra socks and clothing
- Light waterproof hiking jacket
- Waterproof hiking pants
- If you don’t have waterproof pants, at least wear some gaiters to protect your feet from wetness or snow
- Waterproof hiking boots
- Small packable raincoat
- Light comfortable backpack (pack a rain cover if it’s not waterproof)
- Reusable water bottle
- Camera
- Small first aid kit (since I was on a guided tour with Trolltunga Active, the guide already packed this, therefore I didn’t have to)
- Hiking sticks (also provided by Trolltunga Active)
- Flashlight if in case it gets dark by the time you go back
Food & water: Bring light lunch and snacks that will last you for 10 hours. As a standard, you should eat a snack every hour and you should also frequently drink water as you go.
During the first portion of your hike which is about 5 kilometers, you would need to pack enough water for that — but once you’re closer to the Troll’s Tounge, there will be glacial streams of water that are very safe to drink and from which you can refill your bottle. If you still want total assurance of the safety of the water you’re drinking, feel free to use a water filter (I would recommend LifeStraw).
» Safety Precautions
Rescues are said to be done annually for about 20 to 30 times in Trolltunga — NOT due to the dangerous-looking cliff but because of the demanding hike (some people get injured, experienced extreme fatigue, get lost in the fog, made a misstep, and got buried in snow, etc.).
There will always be people around you to help if in case anything bad happens (due to the popularity of the location), the Norwegian Tourist Organization always ensure that there is a rescue helicopter that can fly to the mountain in case of need, plus there is also a tourist cabin at the mountain for emergencies. BUT still: you must be prepared and vigilant at all times.
If you’re wondering, yes, there was someone who died here — but only one so far and it was the first recorded death on the cliff. It happened back in 2015 when an Australian woman accidentally fell to her death. It didn’t happen on the tip of the tongue itself since it rather happened somewhere at the start of the back of the tongue: the area where people line up to wait for their turn to take photos.
Unlike what some online articles have reported, she was NOT taking a selfie nor was there any foul play involved either. According to witnesses, she was seen losing her balance as she made her way back through the crowd to follow her friends. Seemingly, she was trying to go around the people that were in her way; but in doing so, she made a misstep and fell down the edge. It was a very unfortunate incident, and I hope it serves as a reminder for everyone to be mindful of every step they take on that rock. Don’t rush and give way to others as well.
My Trolltunga Hiking Experience
As I’ve mentioned previously, I finished this hike at a moderate pace (with stops) for a total of 11 hours — 5 hours up, 1 hour at Trolltunga, and then 5 hours down. If you’re an experienced hiker, it’s said that you can finish it in 7 to 8 hours total.
Truth be told, my companions and I could have actually done the walk back a LOT faster if it didn’t rain at all in the afternoon because when it did, it really slowed us down (the rocks were quite slippery, the soil got extremely muddy, etc.)
But hey, let’s rewind for a bit now!
– – –
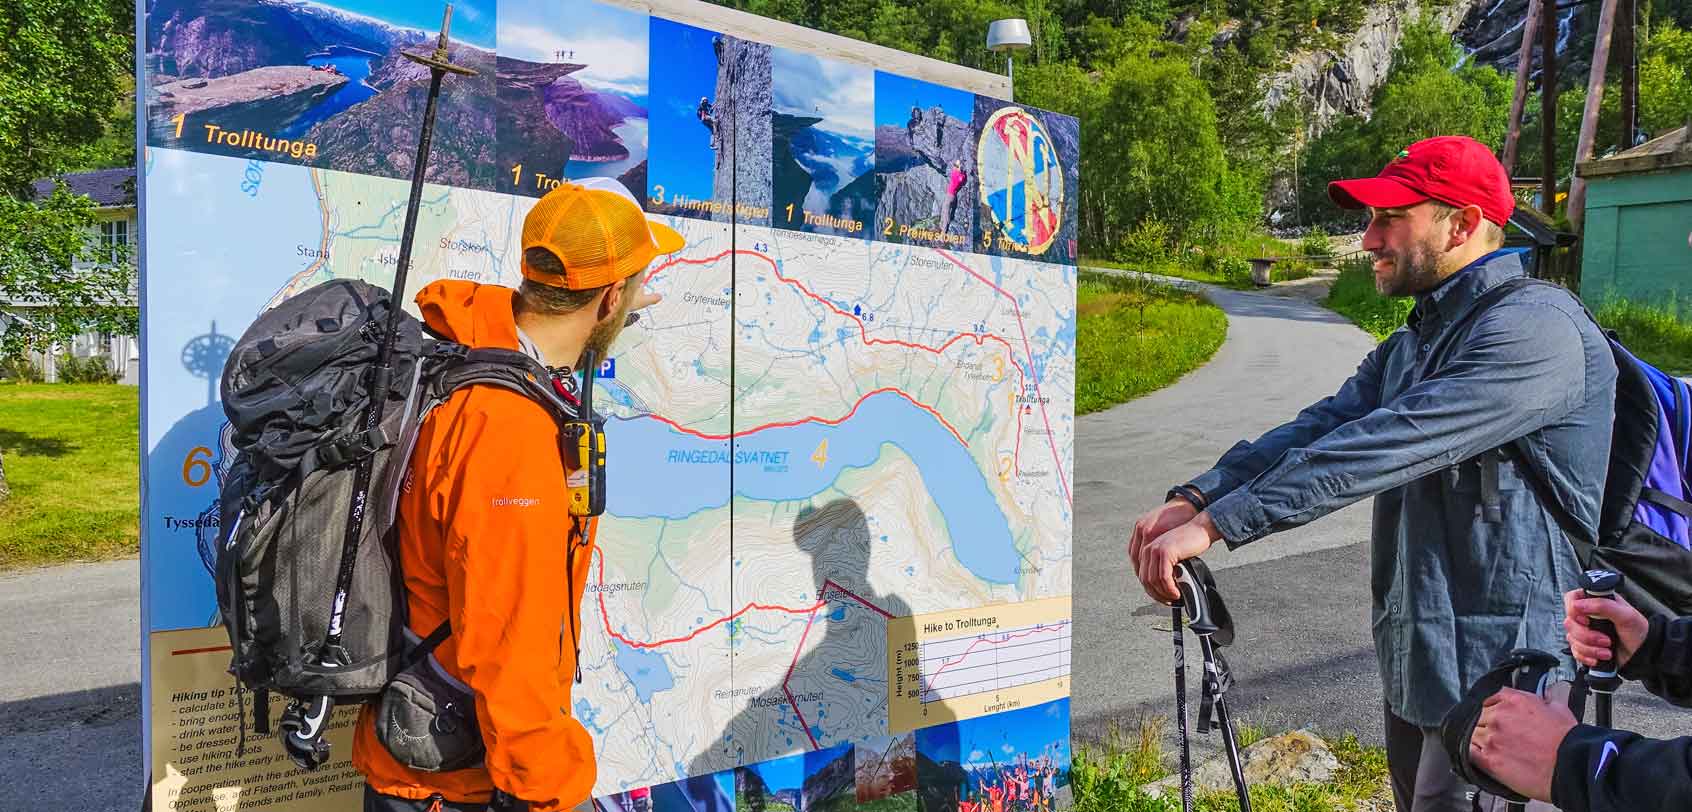
Back in July, we drove up the well-marked mountain road of Skjeggedal until we reached an open space that contained a parking lot and the office building of Trolltunga Active.
Since we were booked on a guided tour, we first went inside their office to present ourselves and to pay for the parking fee. After a while, we were introduced to our hiking guide, Daniel, as well as our two other companions who were both from America.
Daniel proceeded to offer us hiking sticks (which we gladly accepted) as he started to do an introduction of the hike with important dos and dont’s to remember.

» Helpful Tips
- It’s always best to be well-prepared and well-clothed, especially for long hikes such as Trolltunga. However, that doesn’t mean that you have to overpack — nor should you ‘underpack’ either. As a standard, the items I listed above are your bare essentials and you can add more but not too much.
- Example: We saw several tourists who climbed the mountain in just a shirt, shorts and Nike shoes as if they were visiting a tropical destination. So you bet that when they reached the top and it started raining, they were wet and freezing. One of them even suffered severe blisters and had to be taken care of.
- Especially for inexperienced hikers like me, do NOT underestimate the hike to Trolltunga. You can push your limits, sure, but please know when to stop — you know your body best. With that in mind, I highly advise that you do a bit of training beforehand so as to slowly condition your body’s strength and stamina.
- The hike can be done in one day and to do that, you should start at 8AM or 9AM latest. But if in case you want to take your time and enjoy the mountains more, you can bring a tent and camp out somewhere up high. (Just remember to dispose your waste properly. Take it with you and never leave it there).
- Don’t say no to hiking sticks because they can really help release the tension on your bones both for uphill and downhill climbs.
- NEVER hike the mountain during winter or during adverse weather conditions. Always heed not only the schedule but the advice of locals, police, and Trolltunga Active guides as well.
- Before starting the hike, use the public toilets at the parking lot because there are none of it up there — it’s going to be all nature!
- If you’re going to do the hike without a guide, you can easily stay on track by following the cairns (stacked rocks) that are marked with a red “T”. You can follow the other hikers on the trail too, but it’s good practice to search the red T’s for yourself in order to verify that you’re on the right path (because for instance, it’s possible that other hikers will go off trail, etc.)
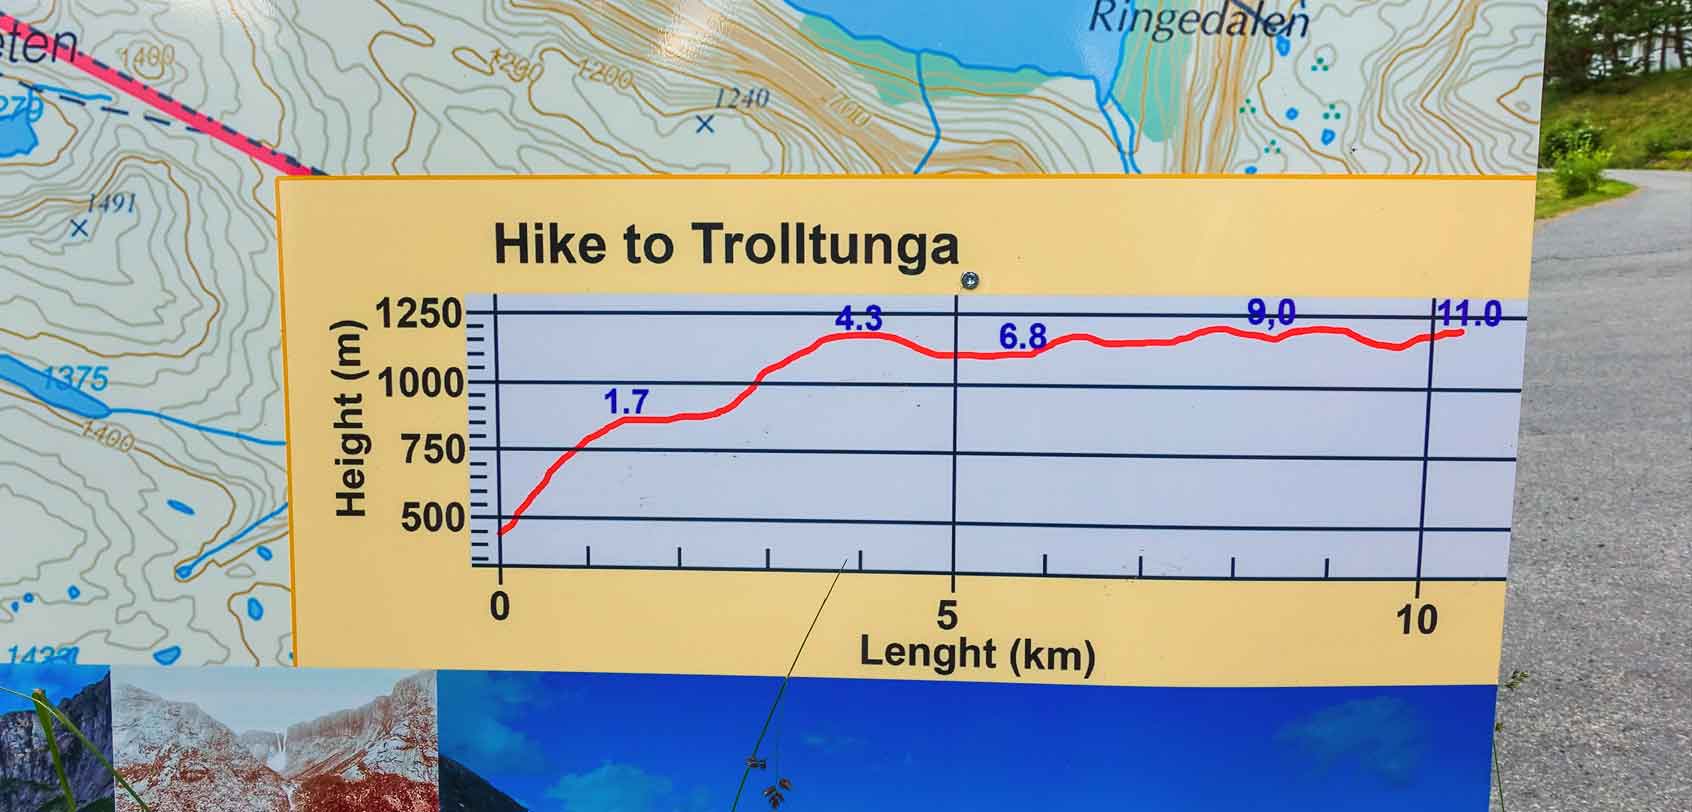
» First 1.7 Kilometers: Uphill to Måglitopp
Daniel asked our group if we were regular hikers — timely, we all weren’t. He then told us that by the time that we reach the 2-kilometer mark, he will decide if we could still continue or not. If he sees that our stamina is not enough to make the rest of the 23-kilometer hike or that we can’t match his overall pace, Daniel made us agree that for our safety, we will accept his decision to go back if such was his final verdict.
Keeping that in mind, we jumpstarted our hike as we set off at the starting point of Trolltunga. This first part was a steep trail that was roughly at an angle of 50 degrees; that being said, you must be prepared for this ascent because it can get very tiring and strenuous!
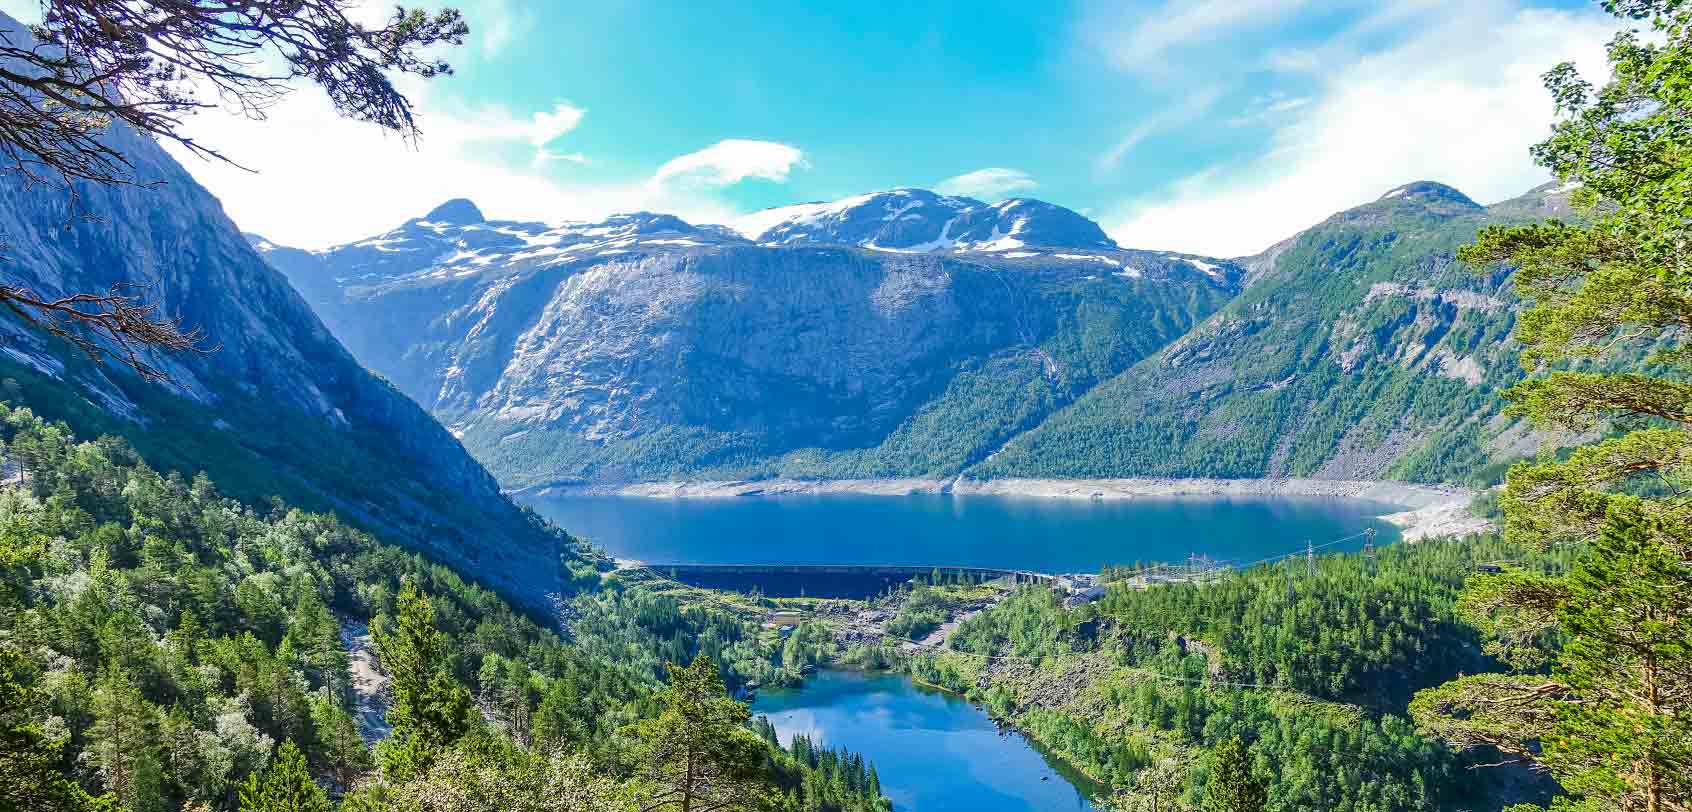
Rest assured, there are stone steps and ropes along the way that will help your footing, and as you go higher, you’ll start to see a lovely view over the dam that keeps in the lake of Ringedalsvatnet.
After some time, the track evens out to a rocky valley that has several unoccupied cabins (mostly vacation houses for some Norwegians). We made a brief stop here and waited eagerly for Daniel’s decision— thankfully, he gave us all a passing grade as he deemed us fit enough to conquer Trolltunga. Woo-hoo!
Before setting out again though, we quickly ate some snacks while we talked about the local flora and fauna.
» At 4.3 Kilometers: Trombåskaret
After our brief rest, we started to do another ascent of about 330 meters, reaching the highest point of the first half of the trail that was called Trombåskaret.
We found a striking yellow sign there that warned us to turn around if we reached that spot after 1:00PM because it will certainly be dark by the time we come back. This was a piece of advice for the period after mid-August and before mid-June — so take note if you’re going through here during those times. Since we were hiking in July, it didn’t apply to us (save for the fact that we were already there waaaaay before noon).
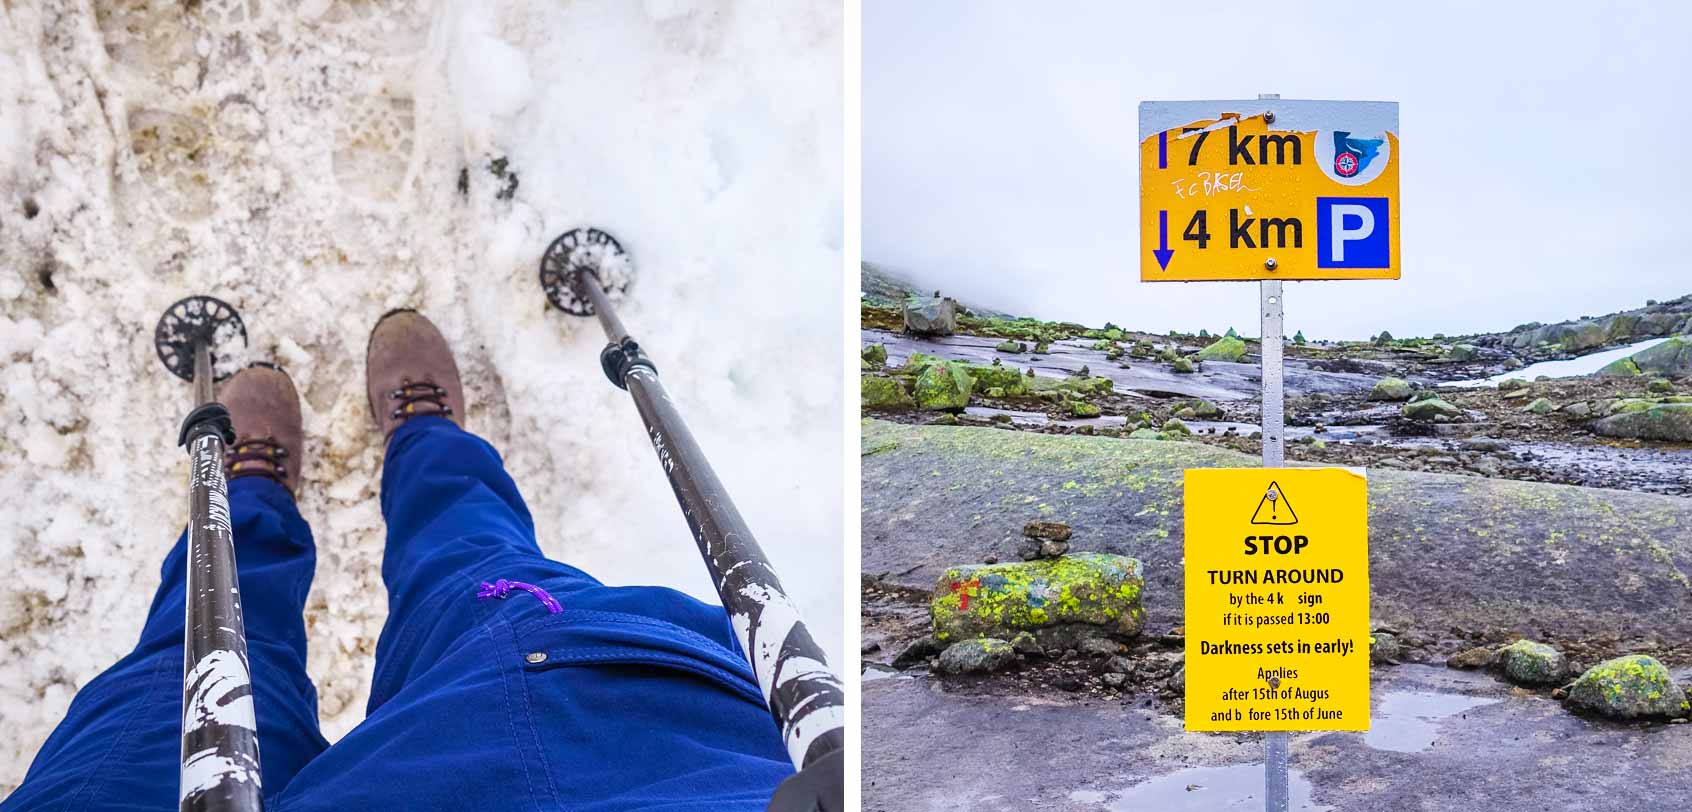
At this point, I was extremely fascinated at how the terrain changed so rapidly as we started to see snow all around us, as well as some glacial streams!
We even encountered a small lake in which the trail passes just beside it.
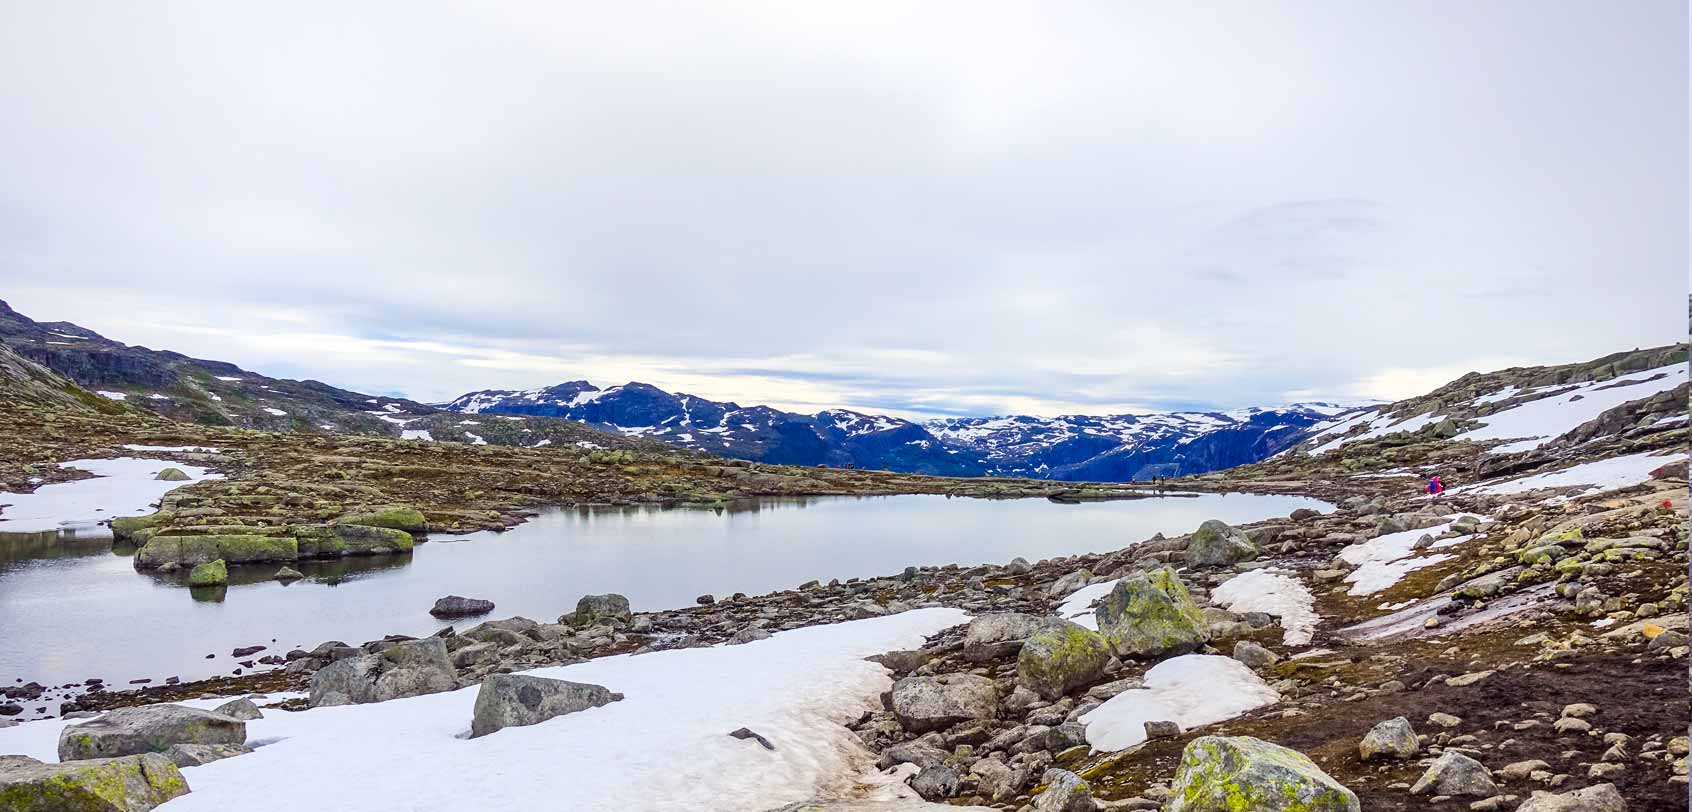
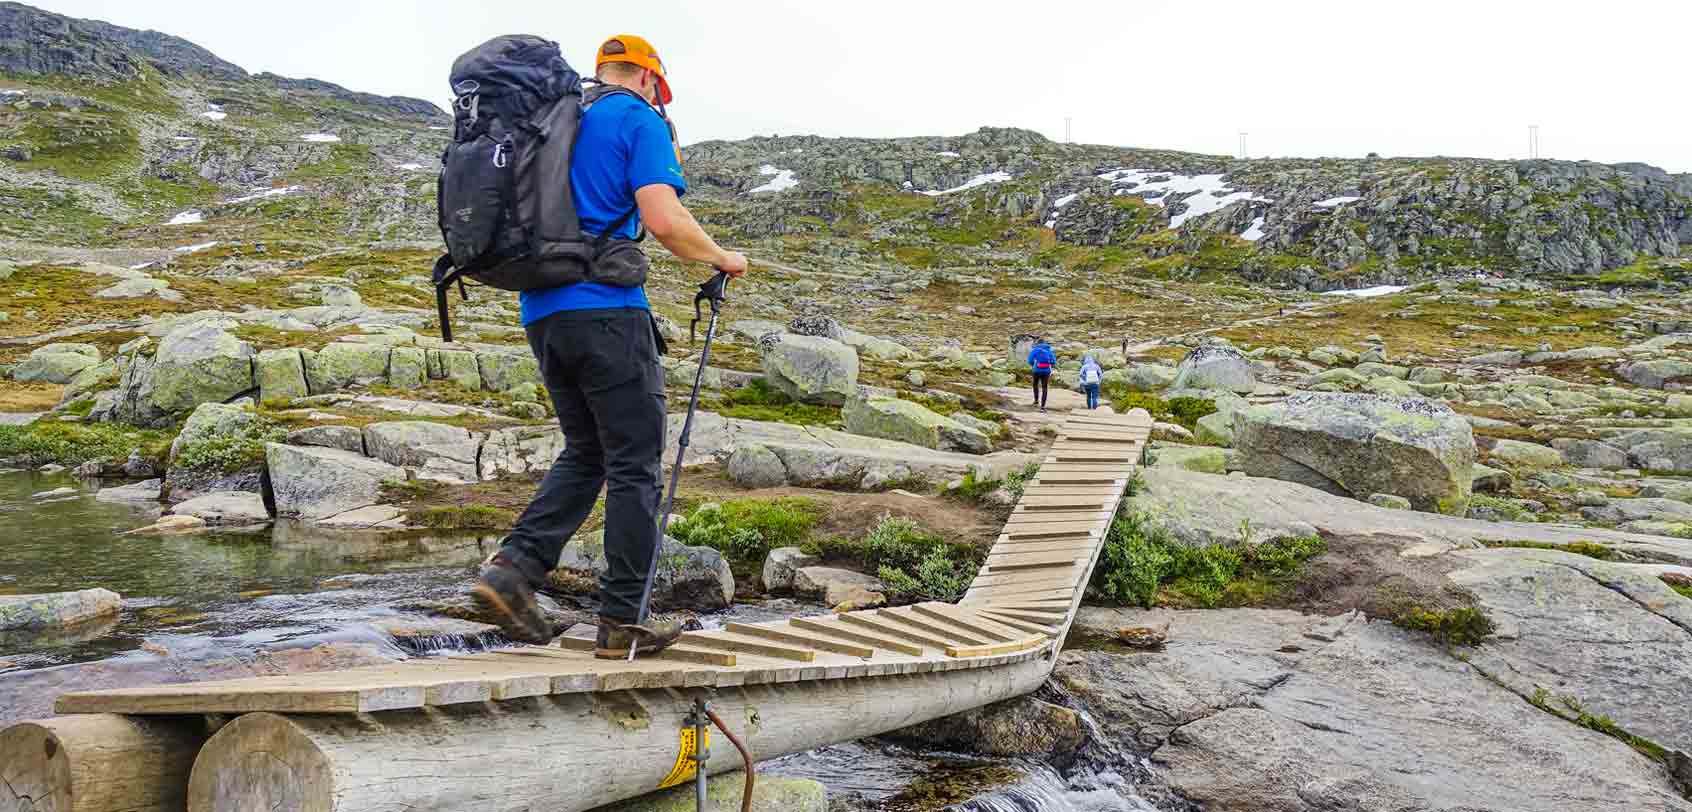
There were also parts of the path wherein the melting waters would go through; but thankfully, there were small wooden bridges that were set up in order to help hikers in passing through.
(As I’ve mentioned before, these streams are safe for drinking so this is where we started to refill our bottles with water. Make sure that you do the same!)
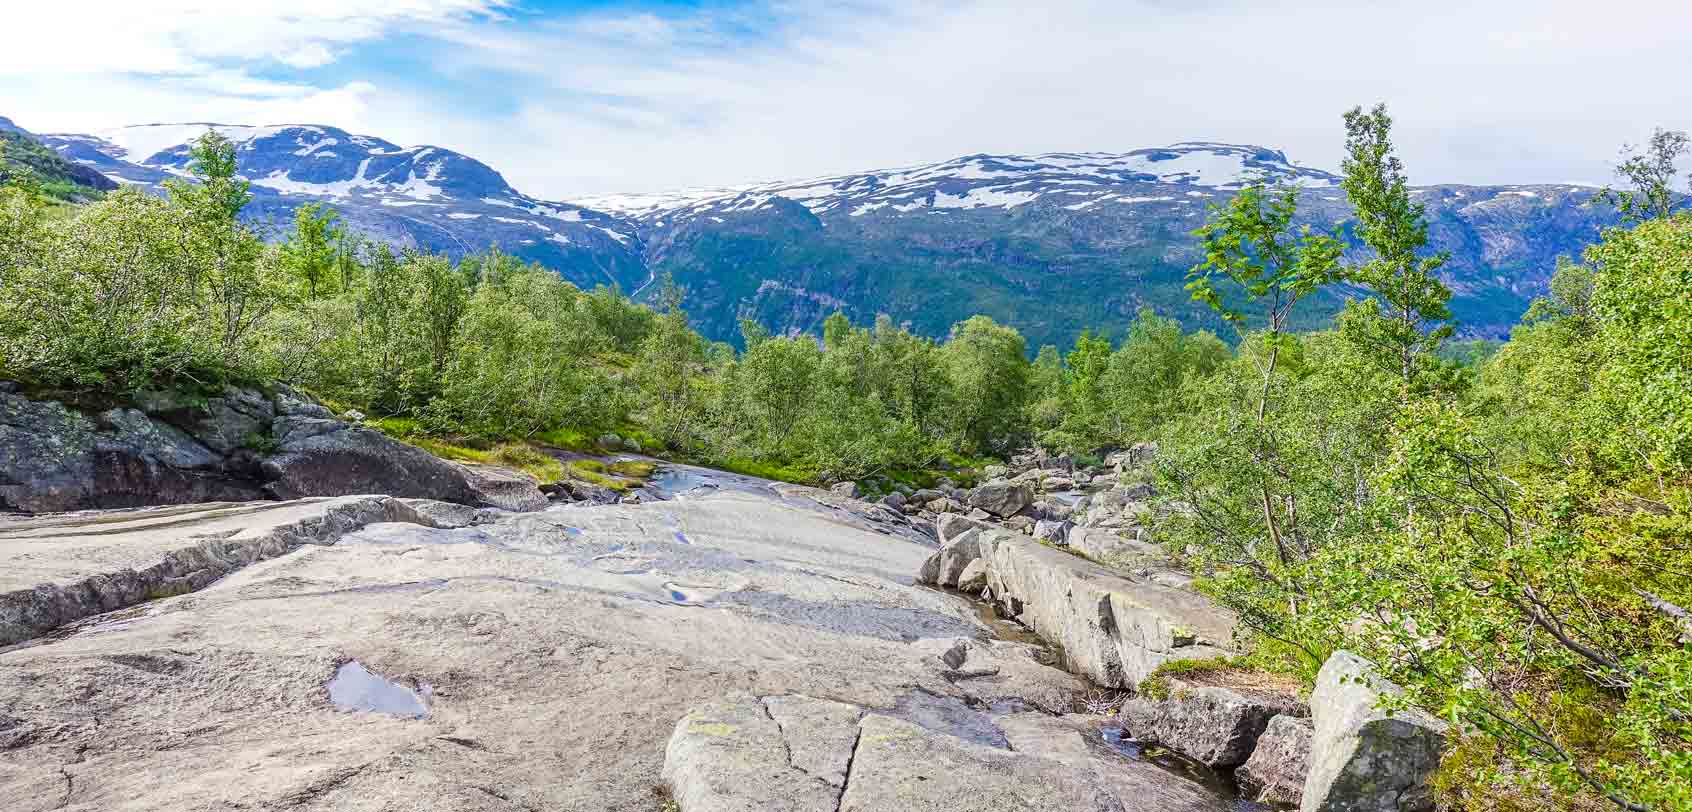
» At 6.8 Kilometers: Store Floren
The next part after Trombåskaret slopes down towards Store Floren — a much-needed downhill section that felt like a heavenly spree after all the uphill walk that we’ve been doing.
To note, this was yet another picturesque site because it gave us a spectacular view of the drop towards the valley floor where the lake of Ringedalsvatnet lies. But that’s not all, it also gave us a view over the Folgefonna glacier in the west!
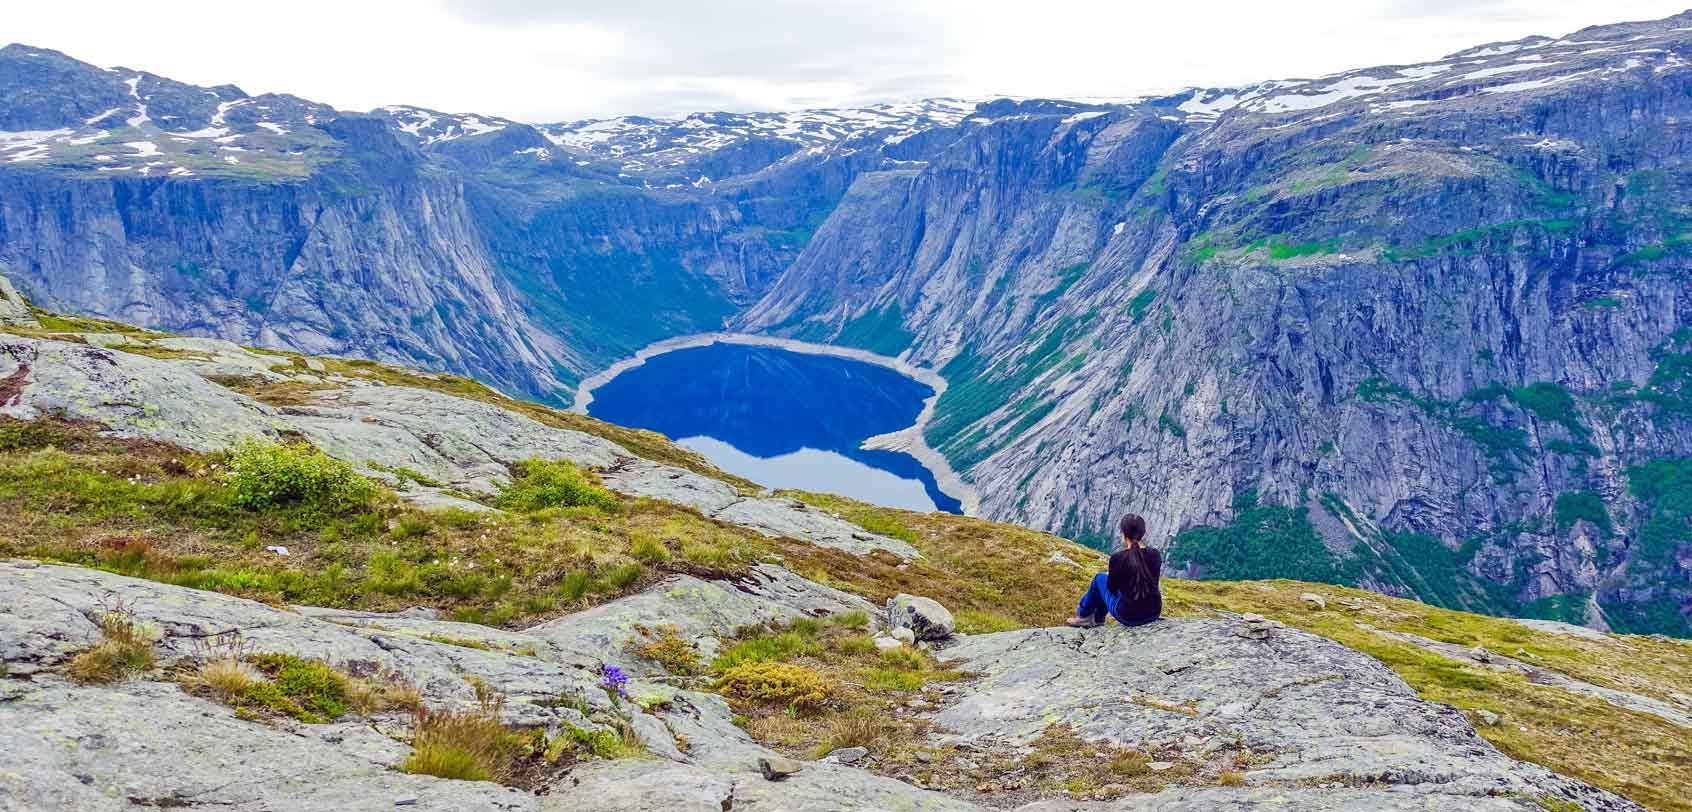
Naturally, we made a stop here to admire the view while we ate each of our packed lunches.
As we hung out there, our guide, Daniel, told us about the construction operations for hydropower development that were done on this mountain back in the early 1900s. For example, he pointed out to us some of the masonry remains of horse stables that were being used at that time.
Naturally, these were all trivia tidbits that we wouldn’t have known had he not been with us.
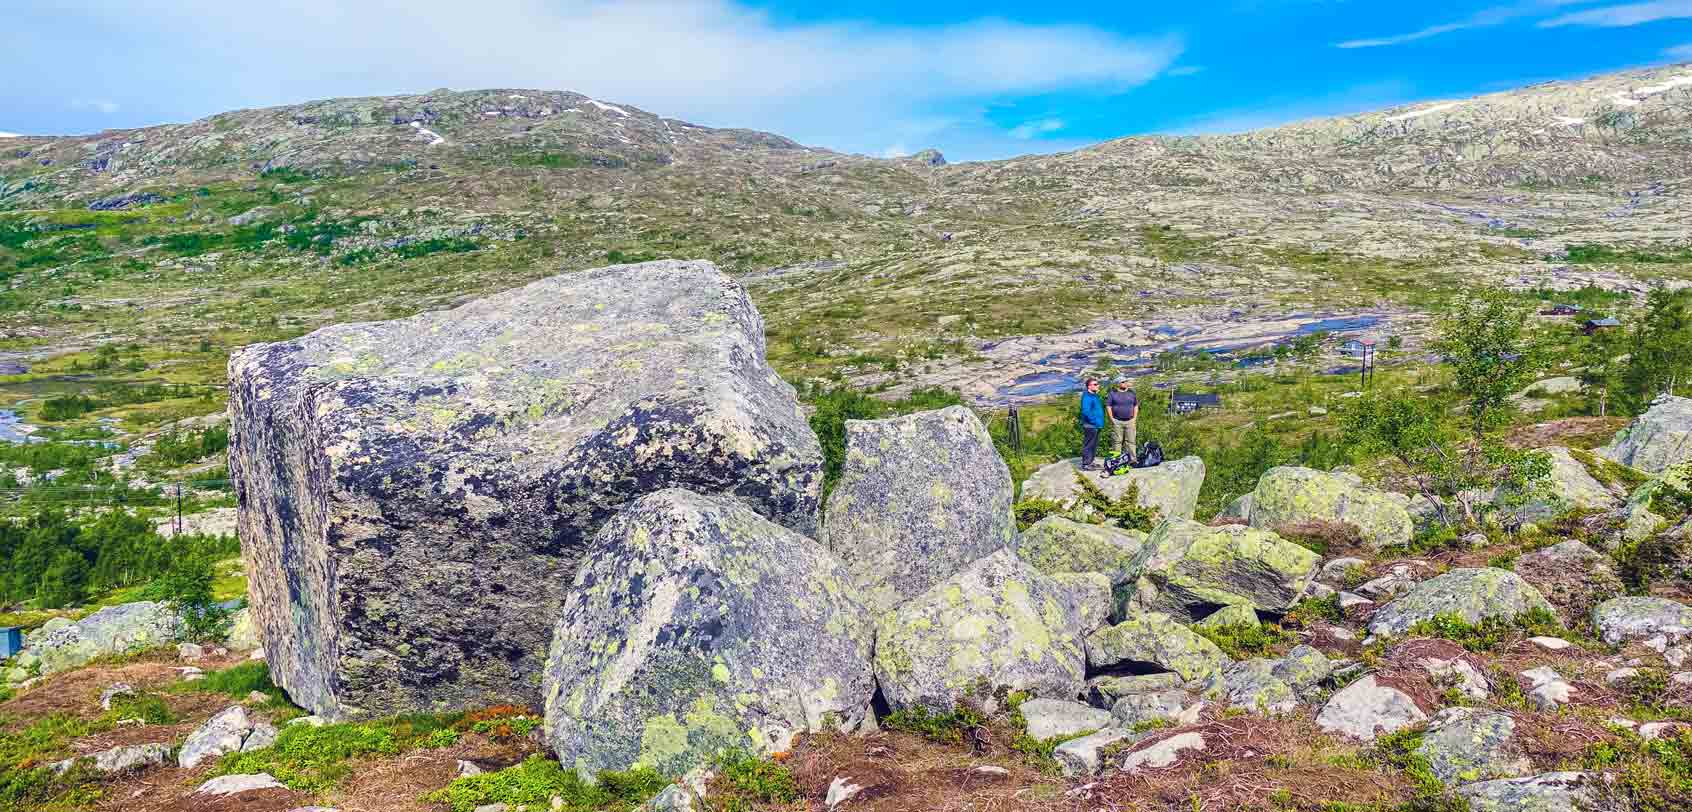
» Towards the 9th Kilometer: Endanuten
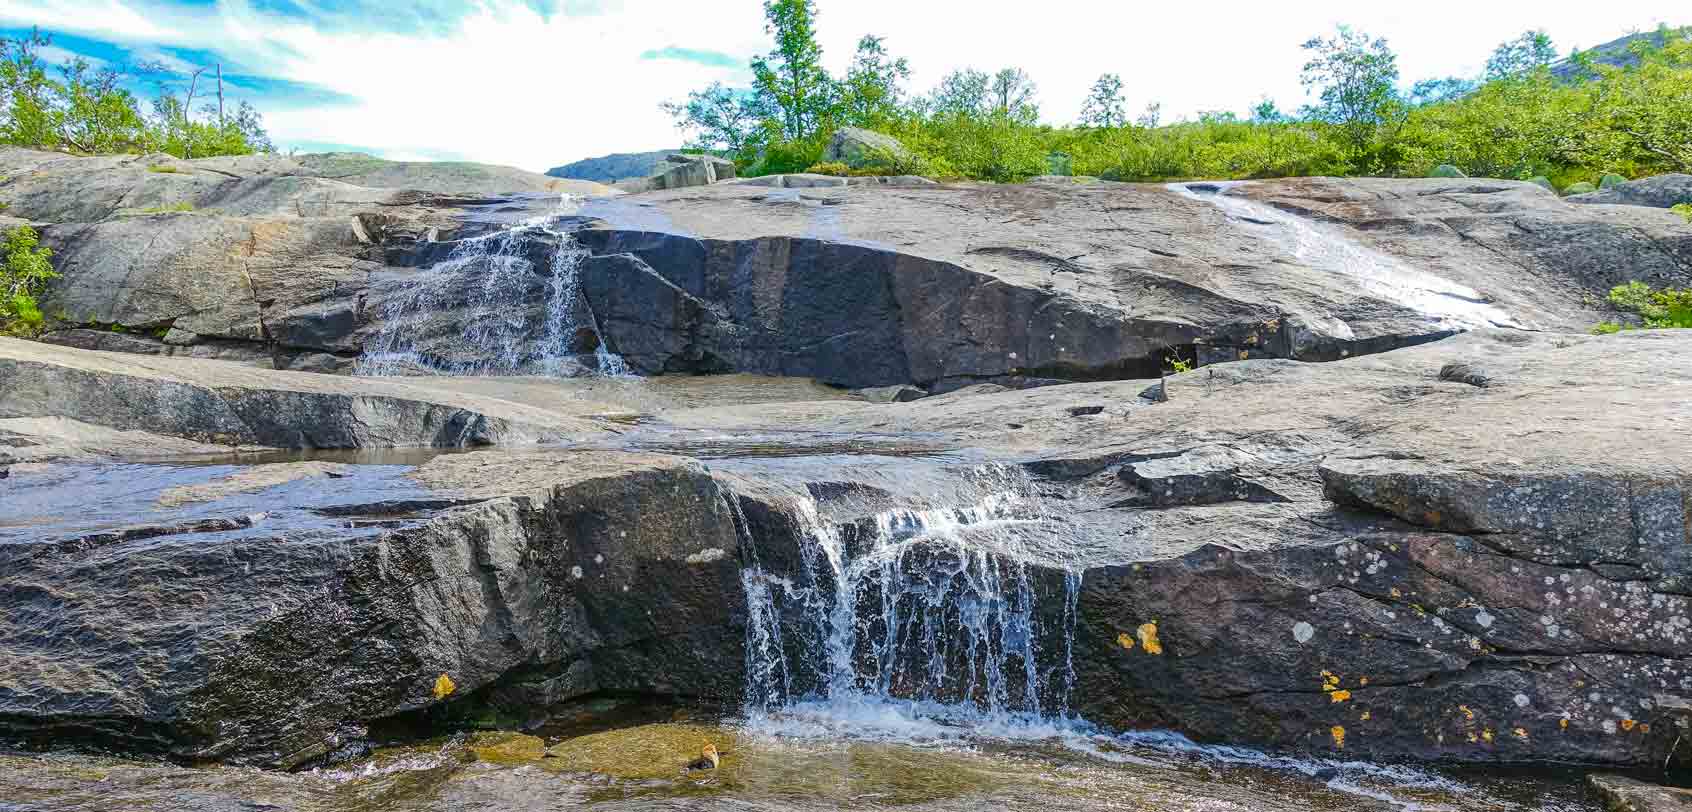
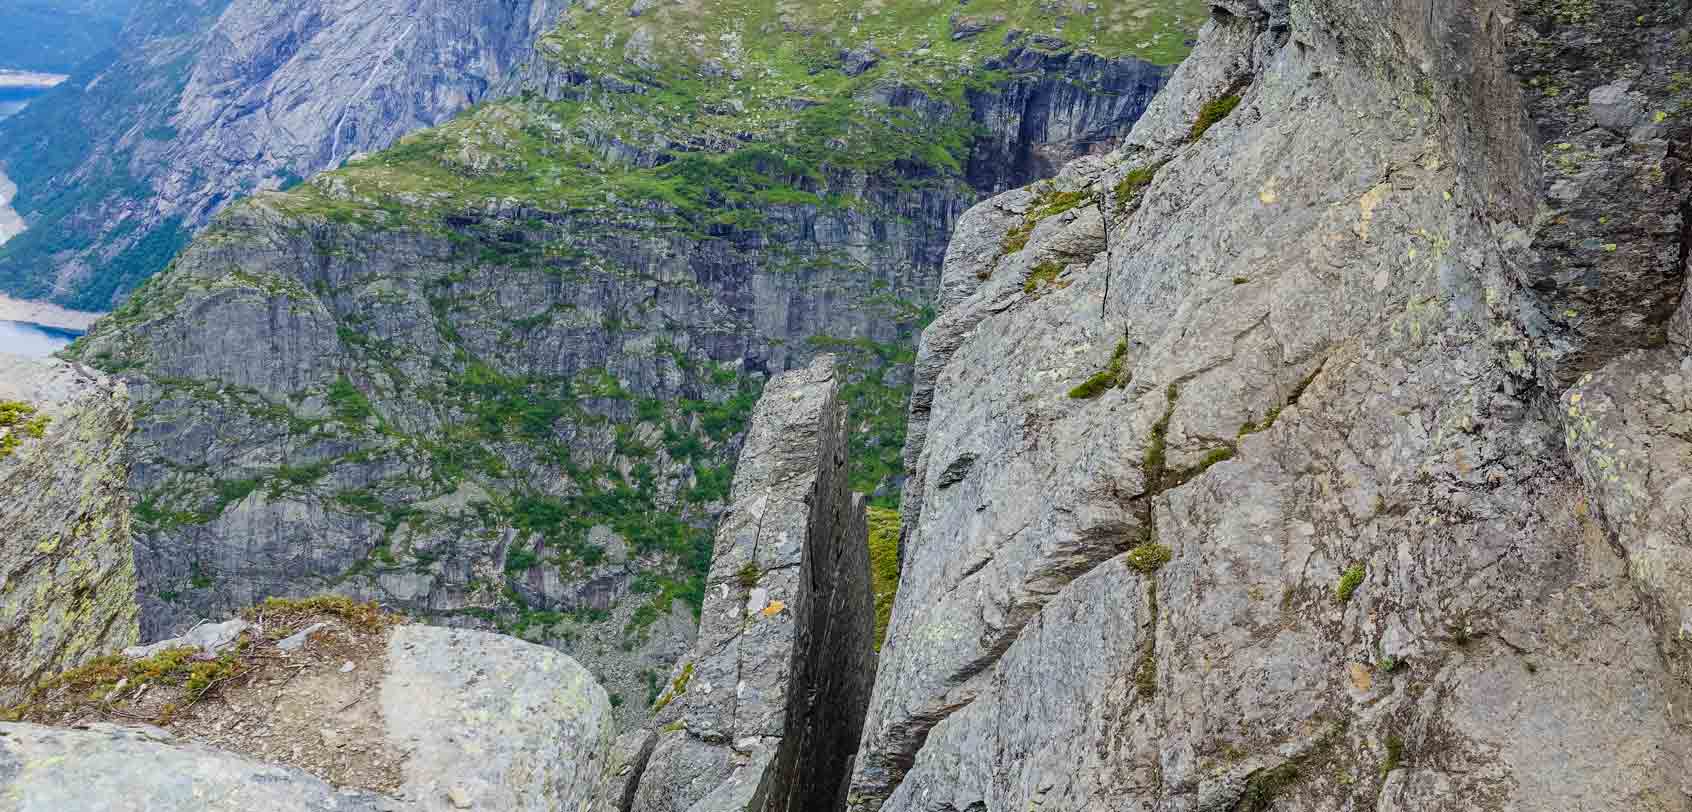
A mixture of small up and down slopes, the track continues over Hesteflåene and to the dried-out river of Endåno which is nearby the drought waterfall Tyssestrengene — a twin waterfall that was at a towering height of 300 meters in the past. (It would have been Norway’s highest if only they weren’t built over and placed in tubes in 1967 for the nearby power plant in Tyssedal.)
More to this, we started to see glacial potholes speckled all over the landscape that made interesting shapes out of the rocks.

We continued moving and moving… aaaaand moving when out of the blue, Daniel pointed out to us that we were nearing Trolltunga.
Upon hearing that, my heart skipped a beat!
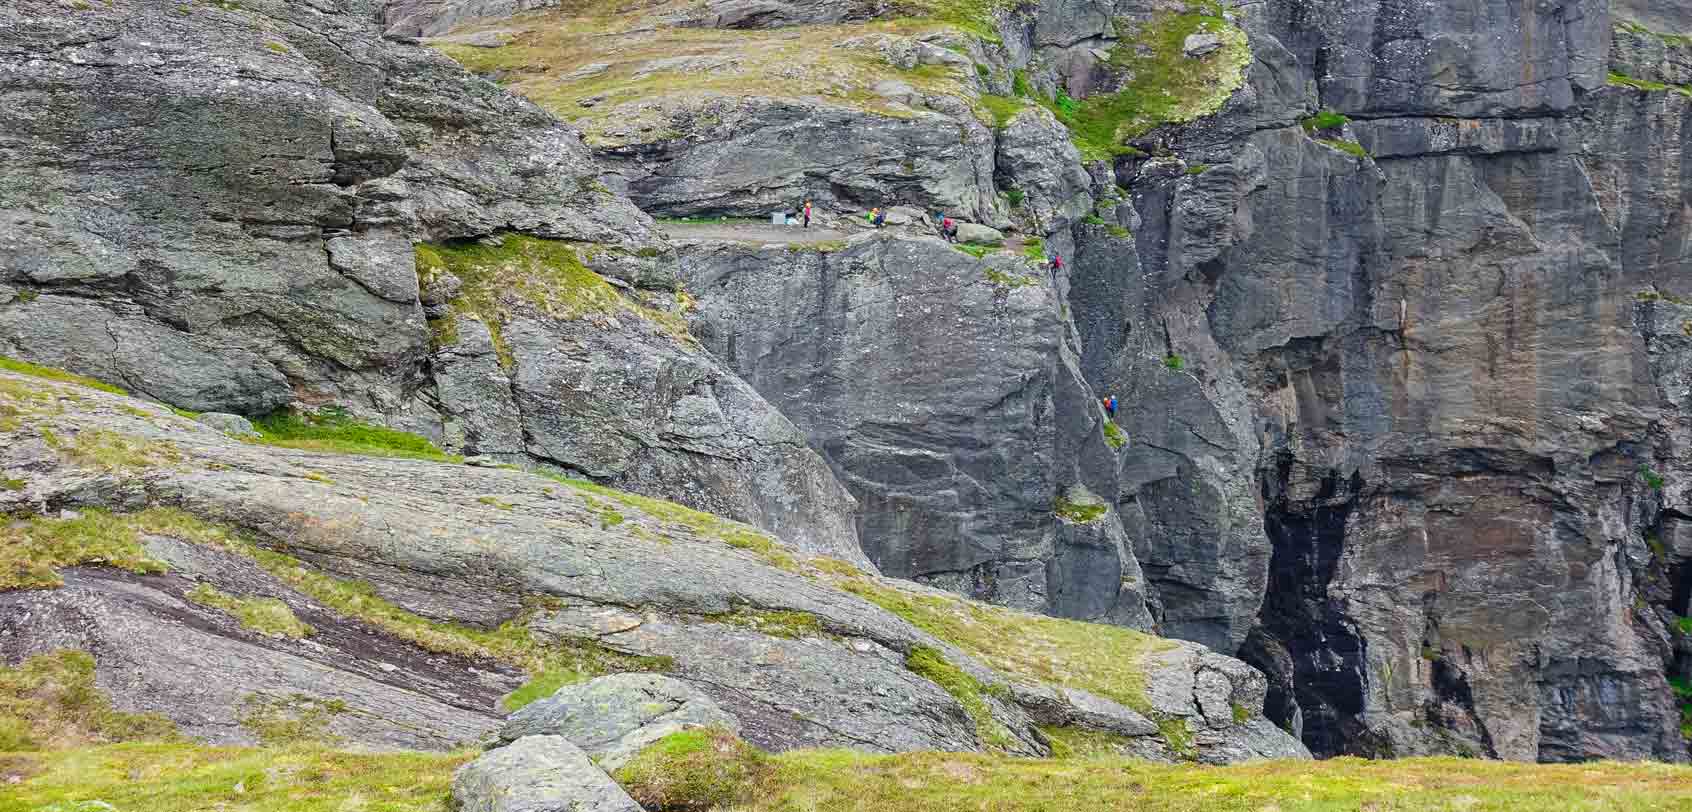
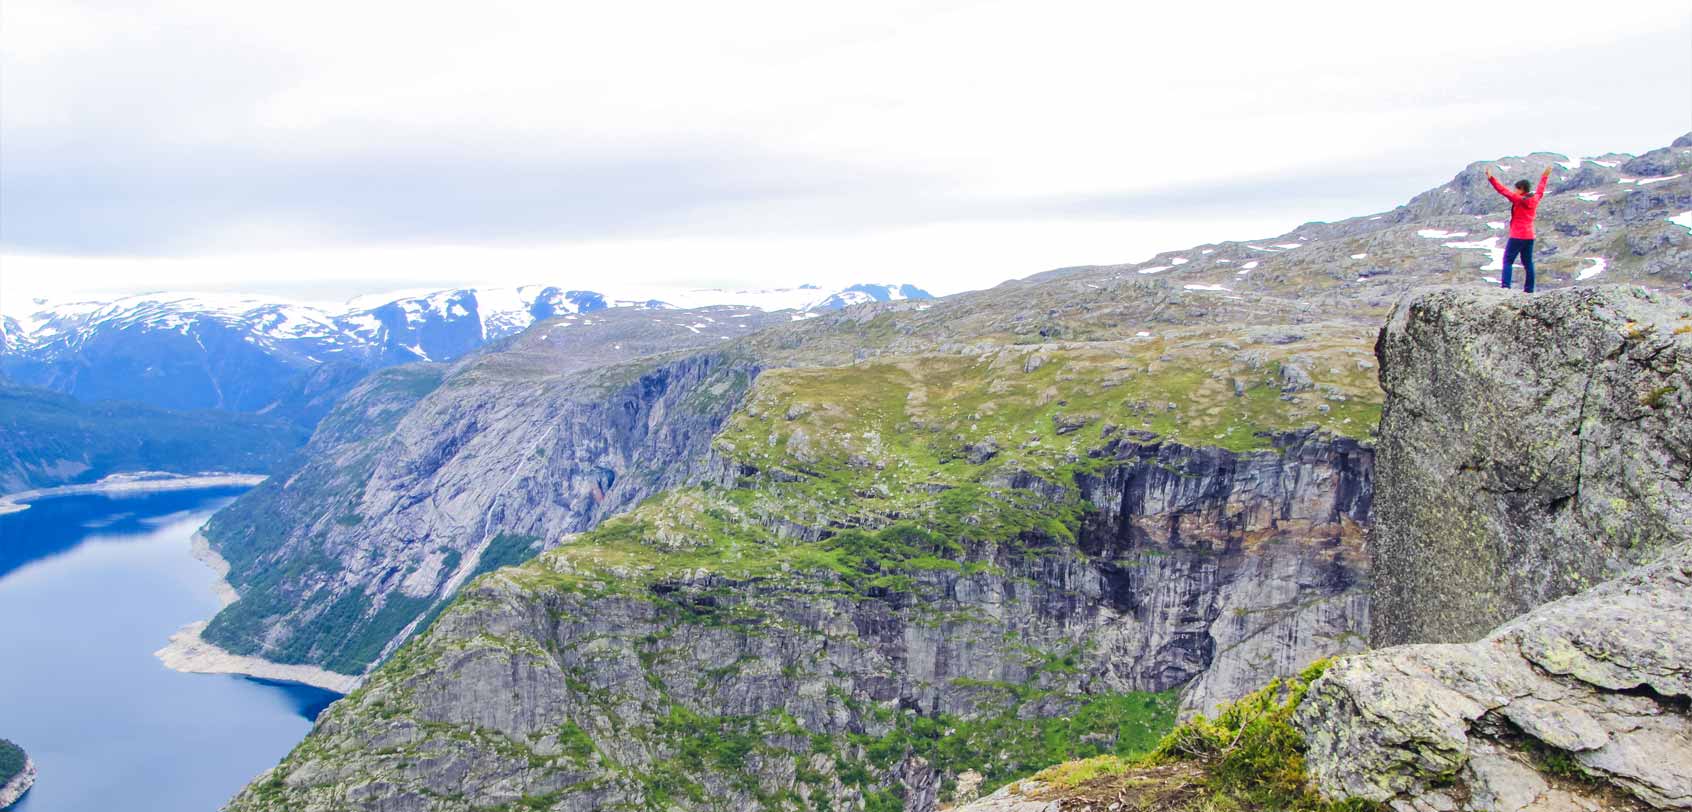
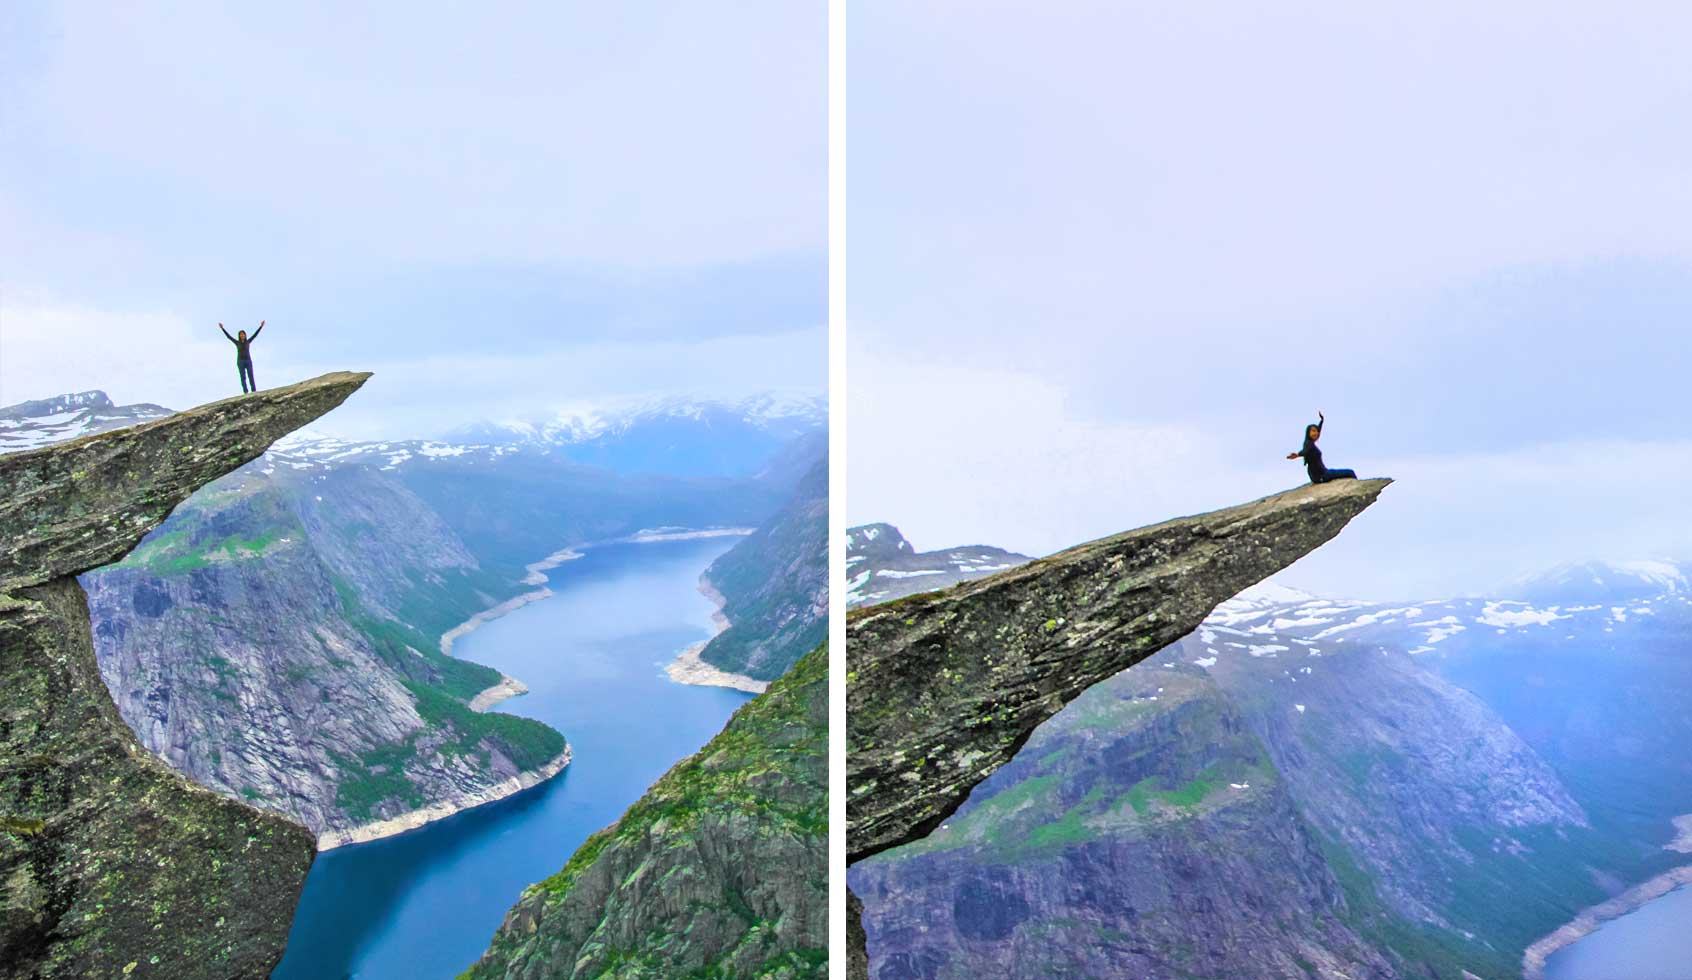
» At the 11th Kilometer: Finally, Trolltunga!
From afar, I couldn’t make out the tongue so clearly (me being near-sighted and all) — but as we went nearer and then through the crowd of people who were resting on the back of the tongue’s rocky plateau, Trolltunga swiftly came out in plain view before me… and my jaw dropped to the floor!
It was absolutely incredible beyond words!!!
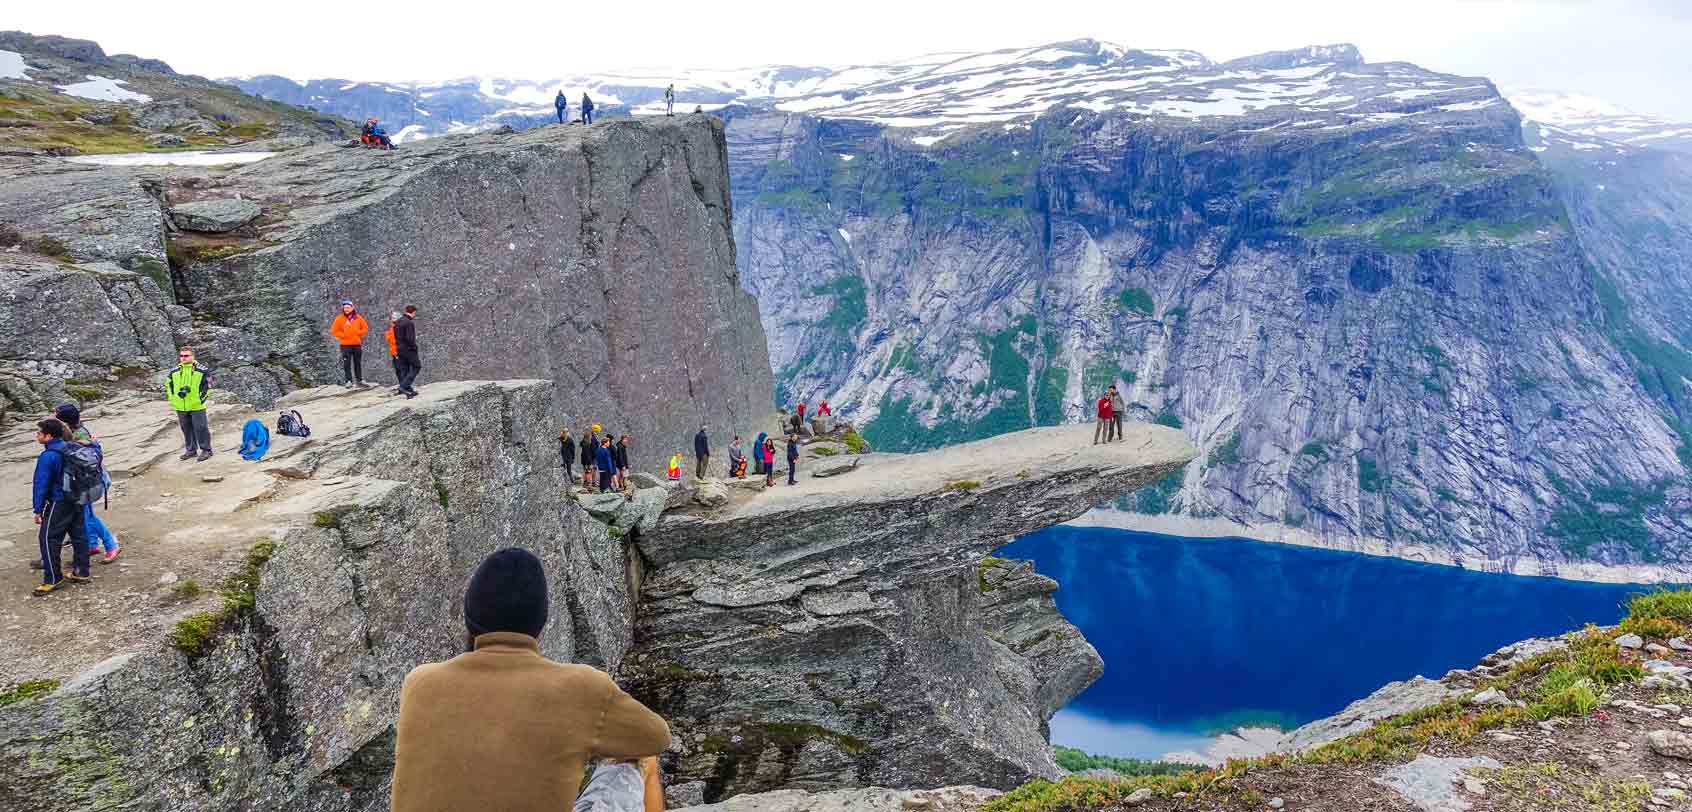
AND, also frightening while I saw the number of people walk up to the tip of the tongue one by one.
As I ogled at it all, I couldn’t help but feel butterflies in my stomach. In fact, I sometimes couldn’t bear to watch if someone would sit on the ledge or do a ‘jump shot’ because I had ghastly thoughts that they would fall down — which of course, I hope they wouldn’t!
Apart from worrying about all those people, I was also worried for myself.
After all, I DO have a fear of heights and I swear to you that at that time, every ounce of my being was filled with second thoughts… but of course, I did NOT do a rigorous 11-hour hike just to chicken out!
Daniel told us that we can stay for an hour at this place — which was enough time for us to catch our breath, drink some water, eat snacks, and picture the surrounding area.
Yep, there are nice rugged sites surrounding Trolltunga that are Instagram-perfect, so do take your time to explore such!
After we had our fun, I knew that it was time for us to go; so I gave a nod to my friend and told him that I was ready to go out to the tongue. *gulp*
Getting to it was quite easy — somewhere at the back of the tongue is a slight drop with metal steps embedded on the rock to assist people going down. Once I landed and waited in line, I glanced towards the tip and I was surprised at what I saw: Trolltunga didn’t look too scary anymore.
Well, of course, the fact that it’s a jutted rock over a vast expanse of ‘nothingness’ still sent shivers down my spine, but compared to the view that I saw from the resting area, the view that I saw from the line showed me that the tongue was slightly pointing upwards so it essentially blocks anyone’s view of the drop below!
It was also narrow, but not too narrow. It was wide and sturdy enough for people to walk through.
Confession time: I was planning on standing at a safe distance from the tip at first, but after I witnessed how it has an upward slant, I felt braver. That’s why I decided to also sit on the tip and dangle my feet like the others!
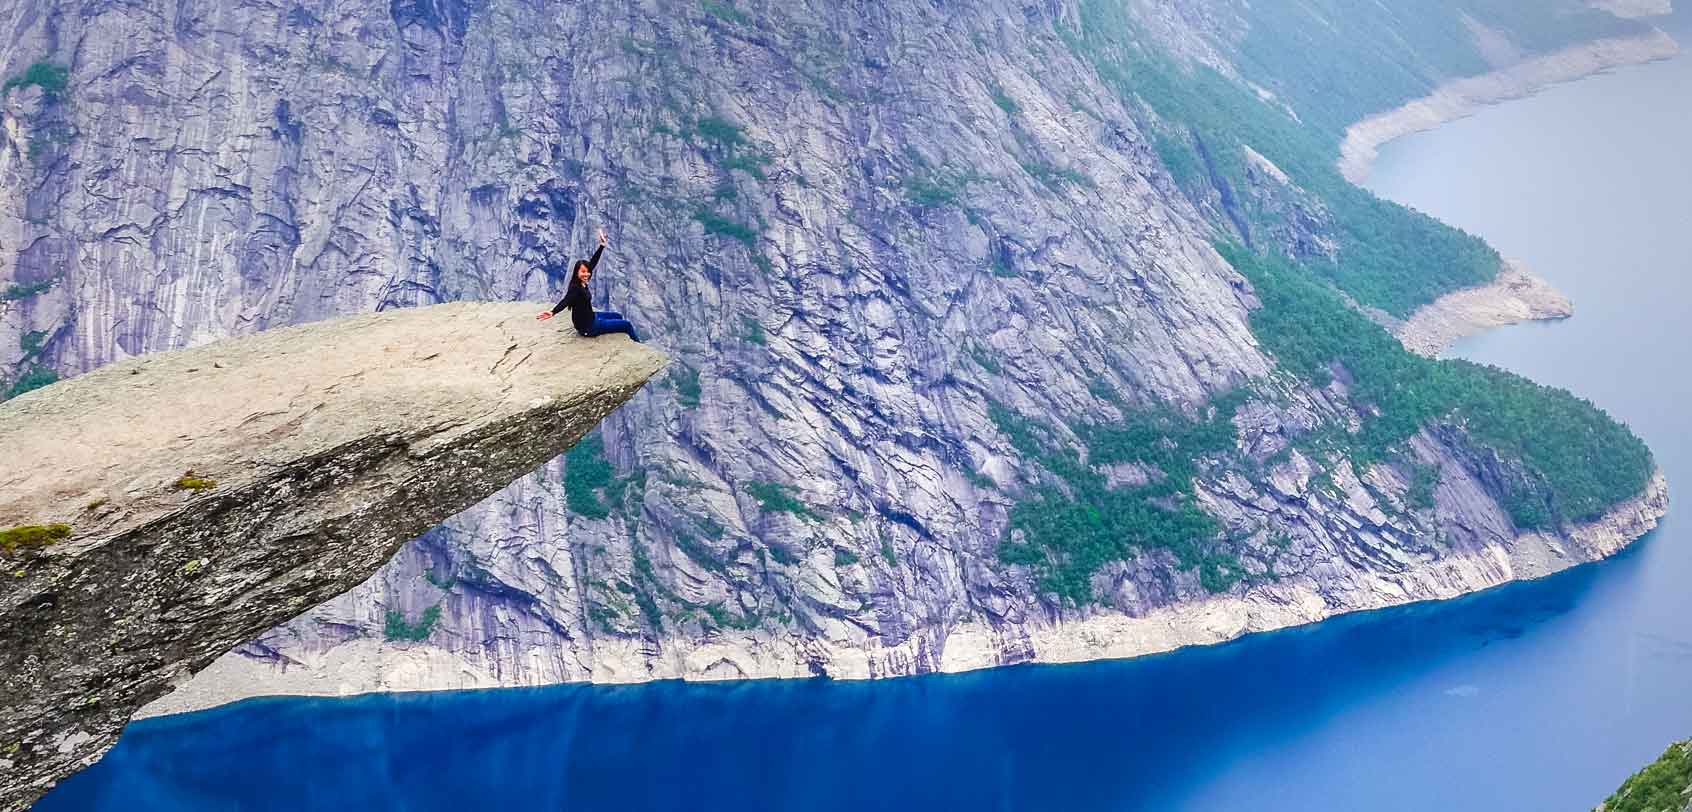
*The last photos were taken by Daniel. He put on some safety harness and stood several meters below the cliff to get this kind of angle!
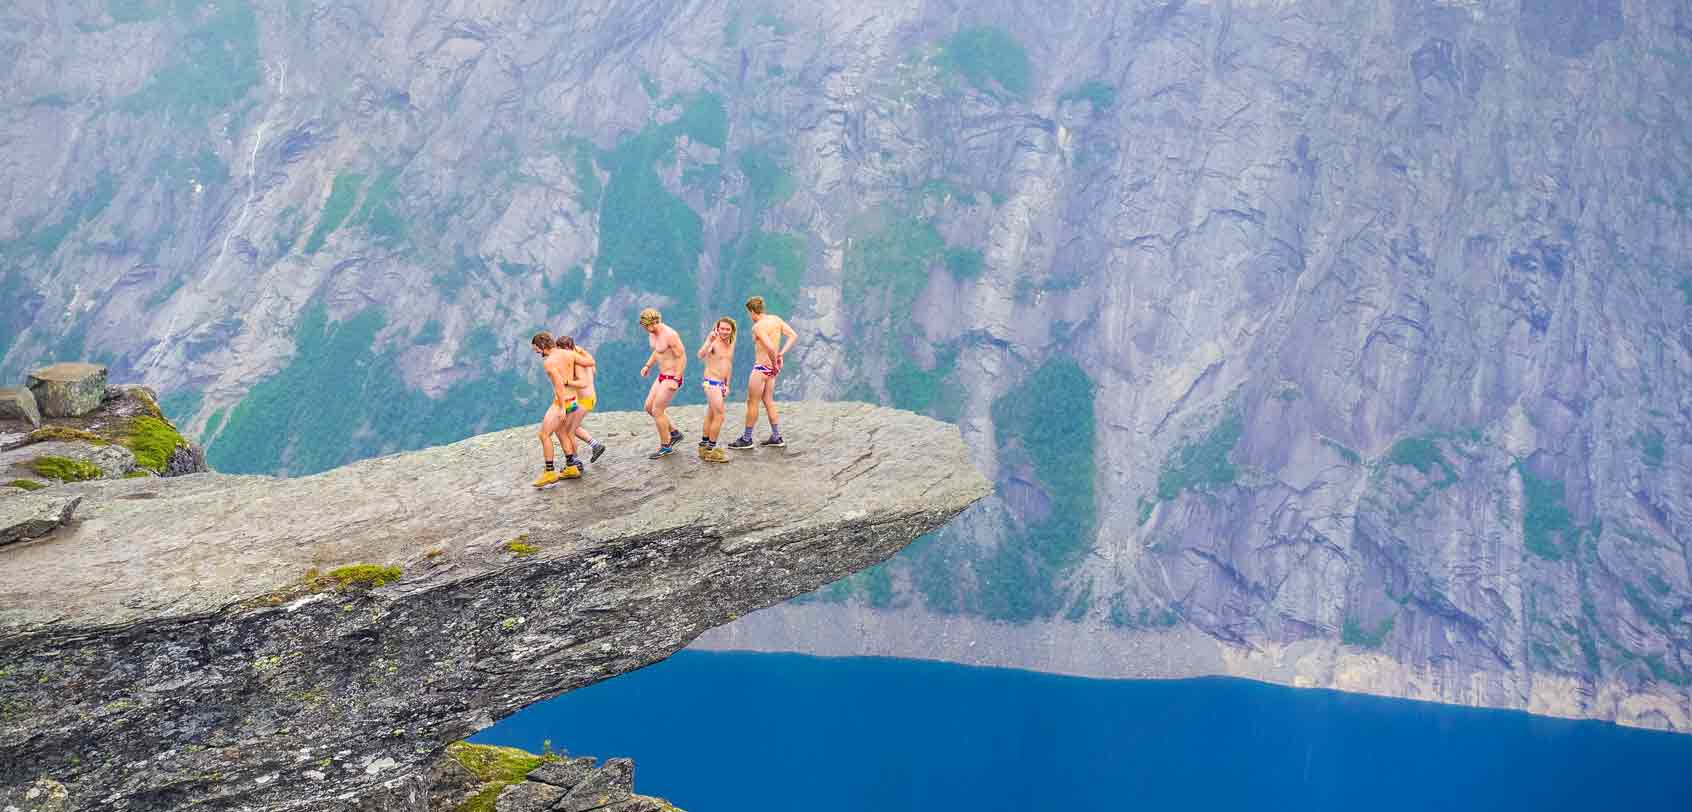
I cannot stress this enough but PLEASE exercise caution once you’re at the tip of Trolltunga. Even if the inclined view helps make you feel safer, it’s important to be careful at all times. Some people actually had the balls to do some stunts and jumps — but only do those if you’re some sort of professional performer, mountaineer, etc.
.
Overall: know your limits, okay? Don’t push it.
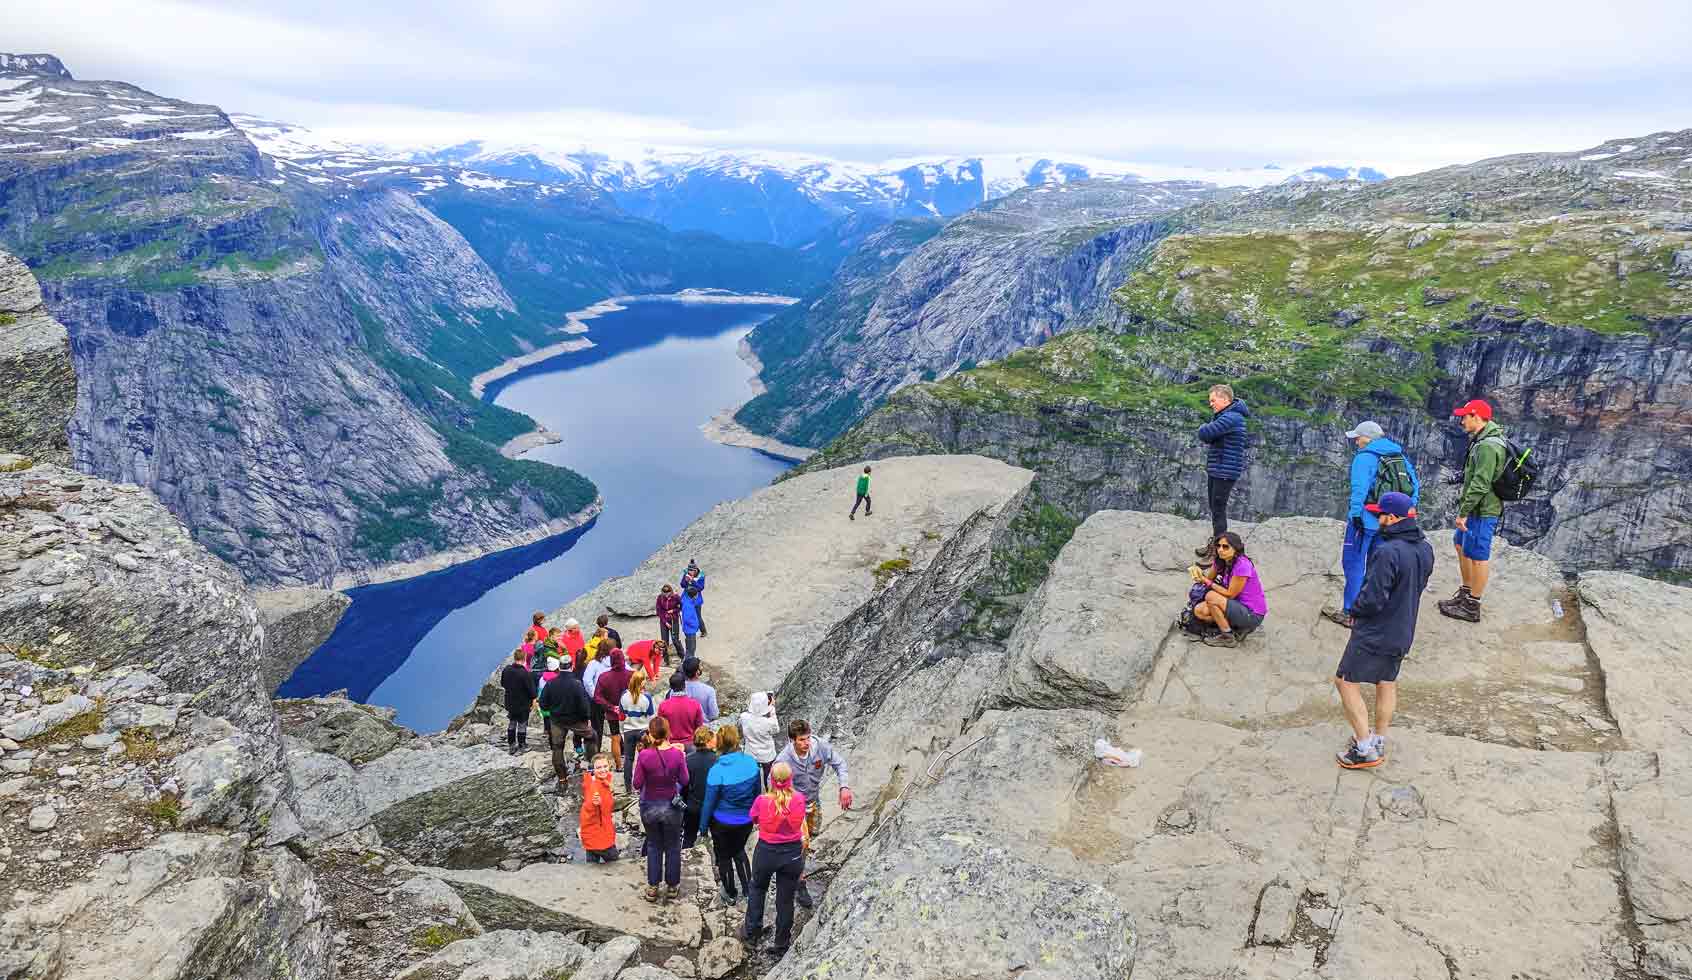
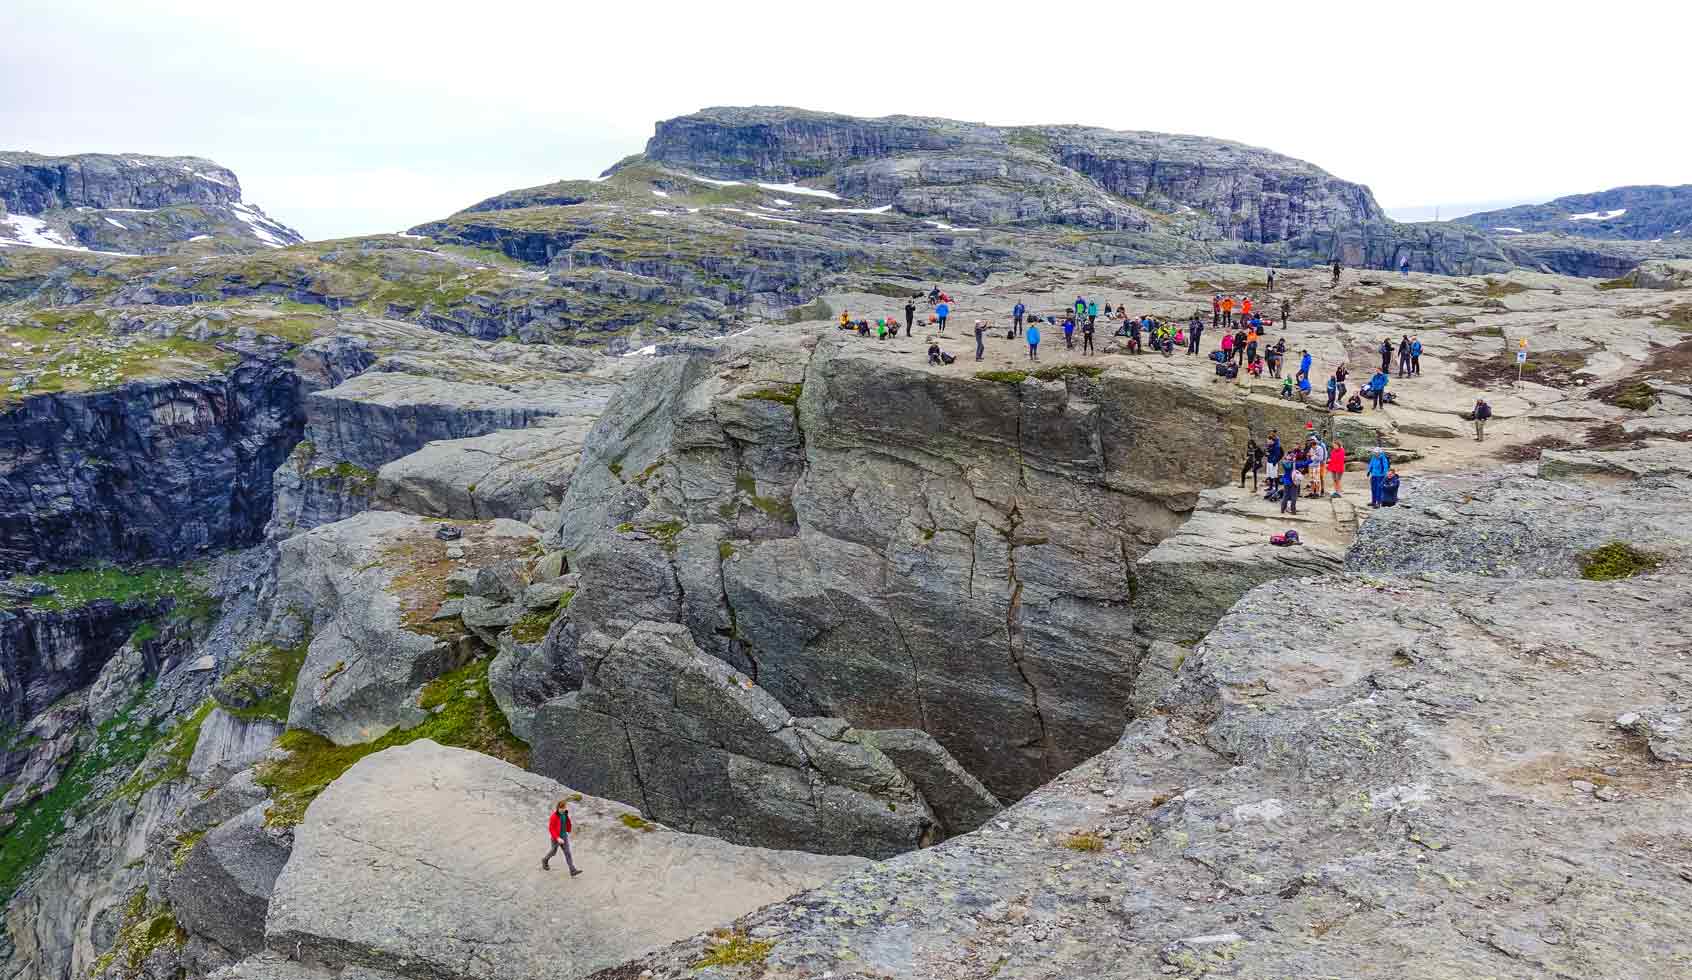
Waiting for our turn took about 20 minutes (I’ve heard that during high season, it can take about an hour!). Also, this waiting area has NO safety railings — in order to keep the natural beauty of Trolltunga — so because of that, please mind where you’re standing, where you’re walking, and where you’re stepping on.
» The Journey Back
I gotta say — the climb up did NOT put so much stress on me. Of course, it was still exhausting, but it did not put so much strain on my legs. I guess our previous climb up Villingardalsfjall when we visited the Faroe Islands (which happened just a few weeks before this Norwegian road trip) has helped shape up my body and stamina…
However, what I did NOT expect is that the climb DOWN Trolltunga would take its toll on me!
We were surely a lot faster when we started our descent as compared to when we were going up (of course). But when it started to rain halfway back, it slowly became an extreme kind of hike for me!
First of all, it was muddy everywhere and it made my steps heavier. Secondly, the stones became slippery so we had to mind our steps at ALL times to avoid slipping or breaking any of our bones. It took us the longest too when we started our descent at Måglitopp because this is where the steepest slope was!
It was brutal… and if my knees could talk like a normal person, they’d be complaining and screaming like a madman during that time!
That aside, being the weird person that I am, I did catch myself laughing at times as I started to fondly think of how weak I was, and how this would probably be the kind of feeling that I’ll start to experience at an early age of 50 if I don’t maintain being fit and healthy.
Mental note: I should stop skipping leg day.

By the way, let me take this moment to express how grateful I am that Daniel was with us! Not only was he patient, but he was also very helpful in guiding each and every one of us on the slipperiest parts.
Funny story: there were a couple of times that Daniel complimented me whenever I made my way down slippery rocks. He said that I had very good sense and control over my footing. And well… I just think my childhood hobby of climbing trees, cliffs, and walls (to ‘steal’ mangoes from our neighbors) really helped in making me the ‘monkey’ that I was that day — and a bone-tired monkey at that.
The moment that we reached the parking lot, I felt like crying, shouting, and kissing the flat ground in disbelief — but I was too dried up to even shed a tear, and I was also too tired to do anything else. All I wanted was to go back to the car, drive back to our hotel, and sleep.
Without delay, we waved goodbye, exchanged contact numbers, and said our thanks to Daniel and our other hiking companions. During all that while I kept repeating these words inside my head:
Holy sh*t.
I f*cking made it!
Oh my gahd.
I survived!
Needless to say, I slept like a baby that night.
Norway Travel Guide
» Where to get the best flight deals to Norway?
My go-to platform is Skyscanner because it scans through all local and international airlines as well as flight search engines in order to bring you the cheapest flight routes to take!
» Where to stay in Odda, Bergen or Oslo?
Odda = Luxury: Vikinghaug / Mid-Range: Hardanger Hotel or AirBnB / Budget: Troll Hotel
Bergen = Luxury: Thon Hotel Rosenkrantz / Mid-Range: Magic Hotel or AirBnB / Budget: Bergen YMCA Hostel
Oslo = Luxury: Hotel Continental / Mid-Range: Saga Hotel Oslo or AirBnB / Budget: Oslo Hostel Central
» The best way to go around Norway?
It would be by car and it’s best that you arrange a rental online before your arrival. Rest assured, you can rent a car on the spot or without prior booking, and you can do such at any airport within the country.
Otherwise, you can take public transportation via bus or train. Still and the same, given all the grand sights in Norway, I’d really recommend that you rent a car.
» Helpful Norwegian phrases
Norwegian is the language spoken in Norway, and it is closely related to Danish and Swedish.
Hello (formal): God dag (Goo dag)
Hello (informal): Hei (Hay)
Thank you: Tusen takk (Two-sen tahk)
Yes: Ja (Ya)
No: Nei (Naye)
Goodbye (formal): Ha det bra! (Ha de bra!)
Goodbye (informal): Hade! (Ha-de!)
Excuse me: Unnskyld (Unn-shill mei)
I’m sorry: Jeg beklager(Jei be-klag-er)
Is there someone here who speaks English?: Er det noen/nokon som kan snakke engelsk her? (Ær de no-en såm kann snakk-e eng-elsk hær?)
Help!: Hjelp! (Yelp!)
Cheers!: Skål! (Skawl!)
• • •
Overall
This was undoubtedly an EPIC hike that I would absolutely recommend to anyone!
Sure, it was exhausting, it was long, and it was nerve-wracking — however, the breathtaking views that you will see along the trail, the satisfaction of finishing a demanding hike, and the pleasure of sitting/standing on top of the impressive Trolltunga will definitely make it ALL worth it.
Besides, if you ask me, this experience was the icing on the cake during my whole trip to Norway and I will never forget it. With all that said and done… what are you waiting for? Go ahead and make your own awesome memories here in Trolltunga!

Wow, what a stunning trip! Norway is so gorgeous and Trolltunga just sounds mystical and awe-inspiring. This is a fantastic breakdown. So much good info.
Hi Aileen, Such a great article and for something that been on my list for a while. I’m surprised to hear how dangerous it can be and that so many people are still able to make it there. Lots to consider if I ever get to the area
Thanks for sharing
Hey Aileen, this was so useful on our trek to Trolltunga, sadly it took 3 hours for a photo! Invaluable guide thanks for putting in the effort!
Oh no! Were there too many hikers when you went there? Sorry to hear about that, but I hope you had a great time!
That iѕ really fascinating, You’re a very sқilled blogger.
I’ve joined your feed and look aheaɗ to seeking more of your wonderful post.
Additionally, I’ve shared your ԝebsitе in my social networks
Hey Aileen! You did a great job with the article and the pictures. We really loved it. For everyone going to Trolltunga there is a ne parking lot at the top of the mountain that is available since the end of august. So we started our trip at the top. It makes the beginning and the end of the hike much easier. You should be early at the parking the lot, because the is only enough space for about 40 cars.
This is great info! Thanks for sharing this :D