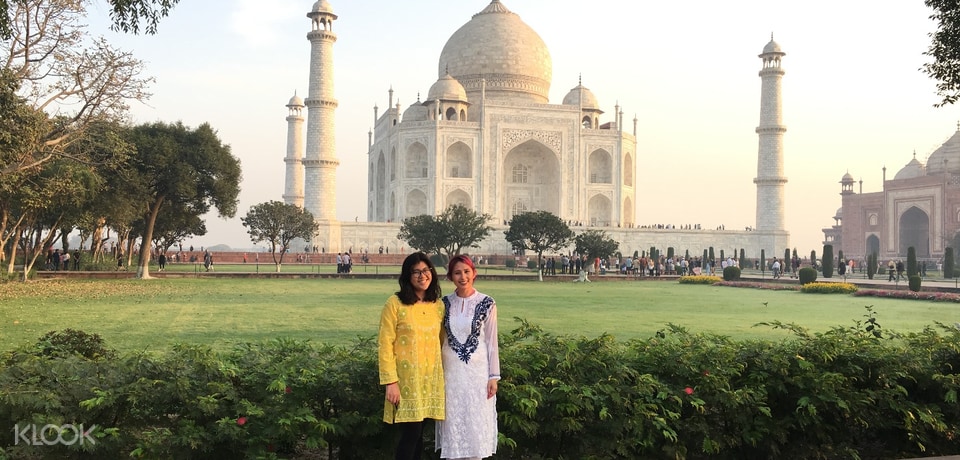
India is one of the few remaining countries in Asia that I haven’t managed to visit — until this year! That’s why you can imagine how stoked I was when I first found out that I’ll be setting foot in its soil; after all, I’ve heard a LOT of great things about India’s culture, food, people, and sights! (Indian Visa)
What to Do in India?
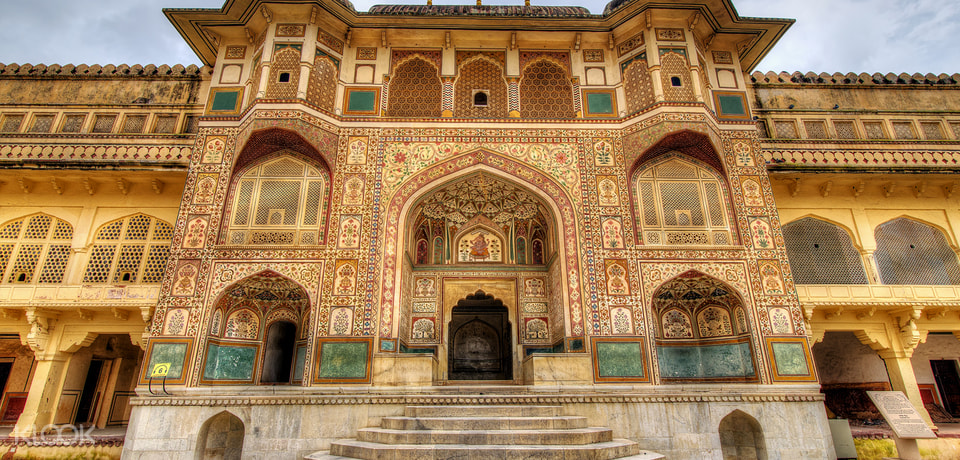
Come and check out this list of the top things to do in India which features the best activities and tours to do in places like the Golden Triangle and more!
Back then though, when my itinerary was finalized, I checked the immigration requirements and… I was surprised when I discovered that I had to get an Indian visa first before entering the country.
I say this because I once heard that there was a visa-on-arrival scheme for a lot of nationalities (such as mine), but apparently, by 2014 they have changed it into an online ETA (Electronic Travel Authorization) or E-Tourist Visa application.
India’s E-Tourist Visa
In November 2014, the ETA (Electronic Travel Authorization) or “E-Tourist Visa” (now aptly called as “E-Visa”) replaced the special visa-on-arrival policy in India and it is divided into 3 categories, namely:
- E-Tourist Visa
- E-Business Visa
- E-Medical Visa
This might sound like a hassle to you, but I assure you: it is very easy to apply for an Indian visa or e-Visa because the process is fast, simple, and straightforward. I was successful in applying for this in just one (1) day; so, armed with my experience, below is an Indian visa guide that will also help you make your India travel dreams come true!
…But first, a disclaimer:
NO ONE can give you a guarantee on your Indian visa’s approval — not even a lawyer, a consultant, a travel agent, or an embassy employee. Anyone who says otherwise is most likely going to be a scammer. That being said, what I can offer you here is a comprehensive guide with helpful tips to increase your chances of getting that Indian tourist visa.
• • •
How to Apply for an Indian Visa Online
Step 1: Determine if you are eligible for an Indian E-Visa
There are, of course, various types of Indian Visas that you can apply for, and with the E-Visa they have 3 categories (as I’ve already mentioned above): E-Tourist Visa, E-Business Visa, and E-Medical Visa.
For this particular guide, I will only be discussing the requirements for an Indian E-Tourist Visa since it’s an experience that I’ve gone through myself. For this, you must first determine if you are eligible by reviewing the following conditions:
- You must be a citizen of the following countries or territories (this is as of November 2017):
– Albania
– Andorra
– Angola
– Anguilla
– Antigua & Barbuda
– Argentina
– Armenia
– Aruba
– Australia
– Austria
– Azerbaijan
– Bahamas
– Barbados
– Belgium
– Belize
– Bolivia
– Bosnia & Herzegovina
– Botswana
– Brazil
– Brunei
– Bulgaria
– Burundi
– Cambodia
– Cameron Union Republic
– Canada
– Cape Verde
– Cayman Island
– Chile
– China
– China
– SAR Hong Kong
– SAR Macau
– Colombia
– Comoros
– Cook Islands
– Costa Rica
– Cote d’lvoire
– Croatia
– Cuba
– Cyprus
– Czech Republic
– Denmark
– Djibouti
– Dominica
– Dominican Republic
– East Timor
– Ecuador
– El Salvador
– Eritrea
– Estonia
– Fiji
– Finland
– France
– Gabon
– Gambia
– Georgia
– Germany
– Ghana
– Greece
– Grenada
– Guatemala
– Guinea
– Guyana
– Haiti
– Honduras
– Hungary
– Iceland
– Indonesia
– Ireland
– Israel
– Italy
– Jamaica
– Japan
– Jordan
– Kenya
– Kiribati
– Laos
– Latvia
– Lesotho
– Liberia
– Liechtenstein
– Lithuania
– Luxembourg
– Madagascar
– Malawi
– Malaysia
– Mali
– Malta
– Marshall Islands
– Mauritius
– Mexico
– Micronesia
– Moldova
– Monaco
– Mongolia
– Montenegro
– Montserrat
– Mozambique
– Myanmar
– Namibia
– Nauru
– Netherlands
– New Zealand
– Nicaragua
– Niger Republic
– Niue Island
– Norway
– Oman
– Palau
– Palestine
– Panama
– Papua New Guinea
– Paraguay
– Peru
– Philippines
– Poland
– Portugal
– Republic of Korea
– Republic of Macedonia
– Romania
– Russia
– Rwanda
– Saint Christopher and Nevis
– Saint Lucia
– Saint Vincent & the Grenadines
– Samoa
– San Marino
– Senegal
– Serbia
– Seychelles
– Sierra Leone
– Singapore
– Slovakia
– Slovenia
– Solomon Islands
– South Africa
– Spain
– Sri Lanka
– Suriname
– Swaziland
– Sweden
– Switzerland
– Taiwan
– Tajikistan
– Tanzania
– Thailand
– Tonga
– Trinidad & Tobago
– Turks & Caicos Island
– Tuvalu
– UAE
– Ukraine
– United Kingdom
– Uruguay
– USA
– Uzbekistan
– Vanuatu
– Vatican City
– Venezuela
– Vietnam
– Zambia
– Zimbabwe
- You are entering India via any of the following airports (given that they’re the only entry points that allow online Indian Visa or E-Visa:
– Ahmedabad
– Amritsar
– Bagdogra
– Bengaluru
– Calicut
– Chennai
– Chandigarh
– Cochin
– Coimbatore
– Delhi
– Gaya
– Goa
– Guwahati
– Hyderabad
– Jaipur
– Kolkata
– Lucknow
– Mangalore
– Mumbai
– Nagpur
– Pune
– Tiruchirapalli
– Trivandrum
– Varanasi
– *Sea ports: Kochi, Goa, Mangalore, Mumbai, Chennai
NOTE: If your point of entry to India is in another place that’s NOT listed above, you will then have to apply for an Indian Visa in the embassy that’s near you. I haven’t gone through such a procedure but you can find some info on the Indian Embassy’s website in your local Indian embassy (one example is this info [click] by Manila’s Indian Embassy)
- Your sole objective of visiting India must be for recreation (sightseeing or tours) or a casual visit to see friends or relatives.
- Remember that this tourist E-Visa is NOT allowed for employment purposes and NGO/volunteer activities. If you’re a journalist or if you’re visiting India for a conference, there is a separate visa for that which you can apply directly for at an Indian Embassy.
- You have a passport that has at least six (6) months of validity from the date of your arrival in India. The passport should also have at least two (2) blank pages for stamping by the Immigration Officer.
- You must have a return ticket or onward journey ticket, as well as sufficient money to spend during your stay in India.
- You do NOT hold a Diplomatic/Official passport or Laissez-passer travel document.
- Your parents or grandparents were NOT born nor have lived in Pakistan. If they are, even if you’re a citizen of the aforementioned eligible countries, you are ineligible to get an online Indian Visa or E-Visa.
How to get proof of onward journey ticket?
Nepal immigration often requires “proof of onward travel” or basically, proof of a return ticket back to your home country or to any other destination aside from Nepal. If you don’t have concrete plans yet AND if you want to be flexible with your travels, booking a flight ticket is, of course, extremely costly — thankfully, presenting a “flight reservation” usually already works. To get this, I recommend purchasing it from OneWayFly; you can get your flight reservation in just a few hours at only $16~!
Once you’re sure that you ARE eligible to apply for an online tourist Indian Visa or e-Visa based from the eligibility rules above, please proceed with the instructions below.
– – –
Step 2: Prepare the required documents and information for your application
Before you lodge your Indian visa application online, it’s best to prepare the following beforehand…
DOCUMENTS (In English)
- Scanned bio page of your passport (showing photo and other details)
- A recent digital photo that shows your full face (with white background)
- NOTE: The photo must be a .JPEG file with a maximum size of 1MB. Make sure that the height and width of the photo are equal (either way, once you upload it, the website will help you crop the photo).
INFORMATION & OTHERS
- Hotel details (with address and contact number)
- NOTE: This is needed for filling out the ‘References in India’ section on the application form online.
- TIP: See here for a list of the best hotels in Delhi and the best hotels in Mumbai.
- Entry and exit date of your travel to India
- Point of entry (airport) in India
- Debit card, credit card, or PayPal account
- NOTE: For debit cards, Visa, Mastercard, and Maestro are accepted. For credit cards, Visa and MasterCard are accepted.
Remember how I said that applying online for an Indian Visa is fast and simple…? Well, there you go *wink*
In case you’re wondering where to look for the best flight deals, my go-to platform is Skyscanner.
– – –
Step 3: Process your Indian Visa application online
The Government of India only does E-Visa applications through this website: indianvisaonline.gov.in. Take note that facilitation by any intermediary, agents, etc. is NOT required to process this kind of online Indian Visa. After all, it’s easy, and it’s best that you do it yourself.

In order to do the application, just follow the steps below…
- Visit the E-Visa website at indianvisaonline.gov.in.
. - Click the orange button that says “e-Visa Application”. This will open up a short form which you will need to fill out. The rest of the fields are self-explanatory; what’s helpful to note is that:
- You must click the box beside “e-Tourist Visa“ — for the next prompt, select “Recreation/Sightseeing“ (or select the other options if it’s more applicable to your situation).
.
- You must click the box beside “e-Tourist Visa“ — for the next prompt, select “Recreation/Sightseeing“ (or select the other options if it’s more applicable to your situation).
- Once done, check the box that says “I have read the instructions…” and then click the orange button that says “Continue”.
. - The next page will show you a longer form which asks for Applicant Details, Passport Details, Contact Details, Family Details, Visa Details, Purpose Details, Occupation Details, References, etc. I will NOT go into so much detail for every section because everything will be pretty straightforward and easy to understand. Some tips to remember while filling this out:
- Under “References”, for the section where it asks for a reference in India, if you’re not visiting a family or friend, you can enter here the details of the hotel that you’ll be staying with. If you’re staying at multiple hotels, you can mention the first one you’re staying on.
If you’re wondering where to book a hotel, I suggest booking via Booking.com or Agoda.com. With them, you can book a hotel with NO pre-payment and you can even cancel the booking a day before your arrival with NO cancellation charges at all. So yes, you can make reservations without any payment, you can change the reservation anytime, and you can cancel them at no cost as well if in case your visa is not approved.
.
TIP: See here for a list of the best hotels in Delhi and the best hotels in Mumbai.
- There are 2 pages for this section, you can accomplish it all and click “Save and Continue” — or if you’re missing some info, you can “Save and Temporarily Exit”. Remember that once you click “Save and Continue“, you can NO longer change any of the information, so make sure you’ve got everything right.
. - Once you’re finished with the long form, the next pages will ask you to upload your photo AND your passport’s bio page.
- Please take note of the specifications and file size limitations (as I’ve already previously mentioned in Step #2; rest assured, the page will remind you of such).
At this point, the website will give you the auto-generated Application ID # unique to you. Take note of this. (Rest assured, the details will be sent later on in an email, but it’s good practice still to write this number down or take a screenshot of the page).
The next step now will be to make the e-Visa fee payment… which I will discuss in the next section!
– – –
Step 4: Do the visa fee payment
The image below is what usually shows before you are directed to the payment portal. Click on the bullet that says “Yes”, click on “Pay Now”, and select “Sbi e-pay*”.
SBI (State Bank of India) ePay and Axis are the banks that the Government of India uses to accept payments for the online Indian Visa applications. I chose SBI and I don’t think there’s much of a difference if I had chosen Axis.

The next web page will show you the portal of SBI which gives you the option to pay for the visa fee with a debit card, a credit card or with PayPal. (For debit cards, Visa, Mastercard and Maestro are accepted and for credit cards, Visa and MasterCard are accepted.)
HOW MUCH IS THE FEE? It depends on the reciprocal relationship of your country and India. If you’re from the Philippines like me, you will have to pay $50 (or Php 2,500~). For a detailed fee chart, you can check here. Otherwise, the usal fee scheme is in 4 levels…
- FREE: Argentina, Cook Islands, Fiji, Jamaica, Kiribati, Marshall Islands, Mauritius, Micronesia, Nauru, Niue Island, Palau, Papua New Guinea, Samoa, Seychelles, Solomon Islands, South Africa, Tonga, Tuvalu, Uruguay and Vanuatu
- $75: USA, UK, Russia, Ukraine and Mozambique
- $50: Citizens of the majority of countries including Australia, Belgium, Brazil, Canada, China, Hong Kong, Finland, France, Germany, Hungary, Indonesia, Ireland, Israel, Jordan, Kenya, Malaysia, Mexico, Myanmar, the Netherlands, New Zealand, the Philippines, Poland, Portugal, Spain, Sweden, Taiwan, Thailand, Vietnam, etc.
- $25: Citizens of Japan, Singapore and Sri Lanka
ANY ADDITIONAL CHARGES? On top of the visa fee, you will need to also pay for the bank charge which is 2.5% of the value. For my case, I paid a total of $51.75
The fee is USD 50 + USD 1.75 bank transaction charge. Total of $51.75.
IMPORTANT: Payment of this fee is NOT a guarantee that your visa will be approved; it is also non-refundable. In case of any double/triple payments, it will be refunded after due reconciliation within seven (7) days. Either way, please be careful while doing the payment process because if the number of unsuccessful attempts is more than 3, you would have to start afresh and redo the whole application form again with a new application ID #.
.
As for the payment status, it may take up to 4 hours before the status updates. But if the status is still not updated, you can verify the payment by going here.
– – –
Step 5: Wait for the results of your E-Visa application
After you complete the whole online application, you’ll just have to wait for an email update from them that confirms that your E-Visa is “Granted”. If it is, they will proceed to send you your Electronic Travel Authorization or ETA.
Normally, visa processing takes 72 hours — but I got mine a day after I applied online and that’s certainly fast. Below is the ETA that I received via email which allowed me to stay for 60 days in which the start date can be anytime within the next 4 months (I even got double entry rights).

You need to print this ETA page out and bring it with you when you travel to India because it will serve as your papers once you’re at the immigration counter in the airport.
NOTE: To be entirely sure, please confirm that your ETA status is shown as “Granted” on this website before you fly. If there are any problems, you can contact their support center at [email protected]
.
The steps I’ve shared here are as per the process I underwent as a Philippine passport holder; if you’re from another country, the process will generally remain the same but it is your responsibility to check any other info or step that might be needed in order to better facilitate your entry to India (for example, some nationalities have to get a clearance card for yellow fever, etc.)
As for my actual experience at Delhi’s immigration, they just took my biometrics (fingerprints and photo) and then asked how long I intend to stay. They didn’t ask any more questions or supporting documents — but it’s still best that you bring those in case they ask for it.
Looking for India travel guides?
Check out all of my top tips for India here!
• • •
» Top India Tours «
Taj Mahal Fast Track Entry
Save time and see this iconic landmark!
Golden Triangle Tour from Delhi
The ultimate all-in-one 3-day tour!
• • •
Booking Essentials

TIP: It’s a good idea to crosscheck the prices with other popular travel insurance providers like World Nomads and HeyMondo (as my reader, you get 5% off)!
.
However, take note a travel insurance’s affordability typically means lesser coverage; so please always ensure that you read the fine print in order to decipher which travel insurance company is the right fit for you and your trip!
• • •
FAQ (Frequently Asked Questions)
An Indian E-Tourist visa is typically valid for 60 days with double-entry access. Take note that these visas are non-extendable and non-convertible.
Only twice in a year.
You can apply at least 4 days before your trip — but not later than 120 days before.
Go to this website and enter your application ID # and passport #.
I highly advise that you get travel insurance for your trip to protect yourself from any unwanted hassles such as travel delay, lost baggage, accidents, etc. To avail, I would highly recommend SafetyWing because they offer the best price and coverage.
TIP: You can get a FREE pre-loaded SIM card with your e-VISA. If you’re landing in Delhi airport, you would just need go to the ITDC Counter to claim. To get there, turn right after you exit the baggage area and look for Ashok Travels & Tours which is basically the ITDC counter.
• • •
Overall
Clearly, applying for an Indian Tourist Visa online is relatively easy and fast; with that, I hope that the tips and info that I’ve shared here will help guide you.
Good luck!


Hi Ms Aileen …sobrang thankful po ako sa lhat ng info na itinuro mo. anyways,pag nag apply po b ako na e visa pag granted isend nila un sa email ko or ako mismo magupdate ng status ng application ko?saka po sa pag apply online need po b sk pc or pwde nman po sa IOS mobile? Thank u and God Bless! More power po,
They will send you an email which you can check on either your laptop or computer or even your phone as long as it’s connected to your email :D Hope that helps and enjoy your trip to India! :D